n8n Integration
Integrate PulpMiner with n8n to automate web scraping and data extraction workflows. The PulpMiner n8n node allows you to consume your saved PulpMiner APIs directly within n8n workflows, enabling powerful automation capabilities.Overview
The PulpMiner n8n community node enables you to:- Fetch structured JSON data from websites using your saved PulpMiner APIs
- Automate data extraction workflows
- Integrate web scraping into larger automation processes
- Use both static (GET) and dynamic (POST) API endpoints
- Skip complex scraping code - let AI handle the extraction
- Get real-time or cached data based on your needs
Why Use PulpMiner with n8n?
🚀 Instant Integration
🚀 Instant Integration
Install the PulpMiner node and start using web data in your workflows. No custom scripts needed.
🤖 AI-Powered Extraction
🤖 AI-Powered Extraction
Automatically structure web data into clean JSON. Our AI handles complex websites with dynamic content.
⚡ Real-Time Data
⚡ Real-Time Data
Fetch fresh data from websites on every workflow execution, or use cached data for speed.
🔒 Secure & Reliable
🔒 Secure & Reliable
Built on Cloudflare infrastructure with 99.99% uptime. Your data stays secure.
💰 Pay-As-You-Go
💰 Pay-As-You-Go
Only pay for what you use. Credits never expire. No monthly subscriptions.
🌐 Any Website Works
🌐 Any Website Works
Extract data from e-commerce sites, news pages, directories, or any public webpage.
Installation
Prerequisites
- n8n Installation: You need n8n version 1.113.3 or higher installed
- PulpMiner Account: Sign up at pulpminer.com if you haven’t already
- PulpMiner API: Create and save at least one API endpoint in your PulpMiner dashboard
Installing the Node
The PulpMiner n8n node package name is:@pulpminercom/n8n-nodes-pulpminer
Follow these detailed steps to install and configure the node:
Step 1: Open Community Nodes Settings
In your n8n instance, navigate to Settings → Community Nodes.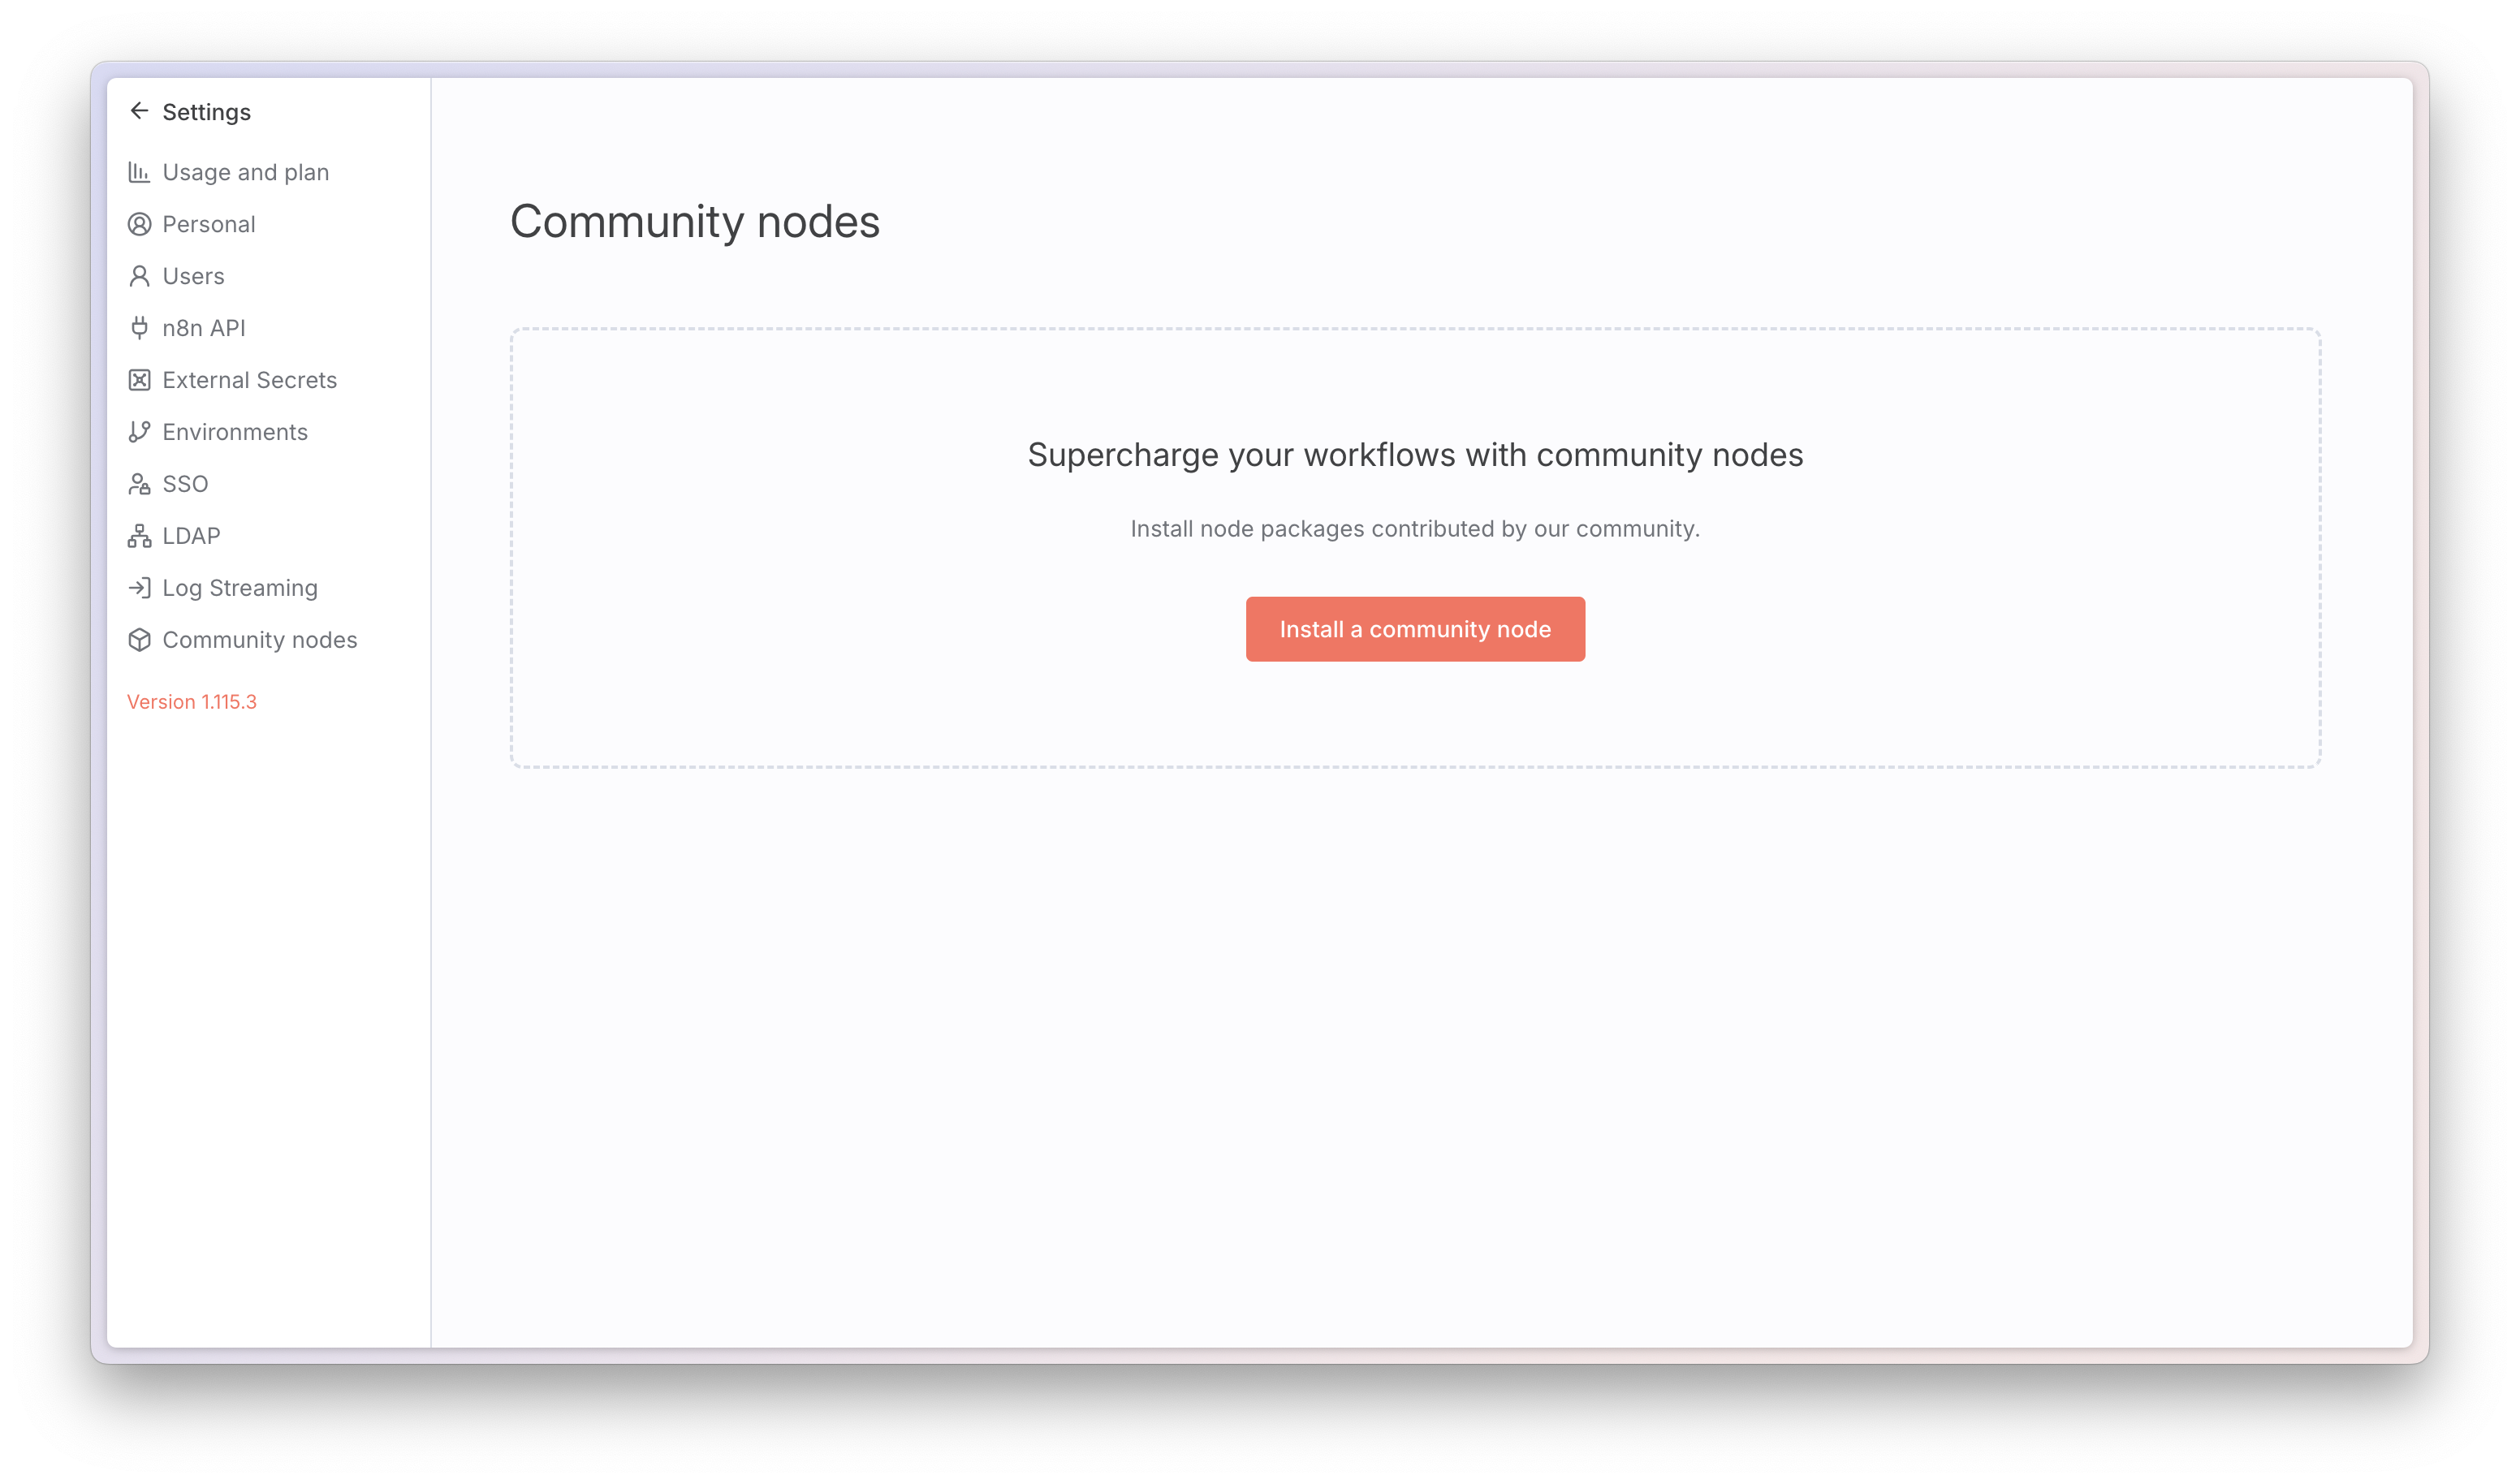
Step 2: Install the Node
Click Install a community node and enter the package name: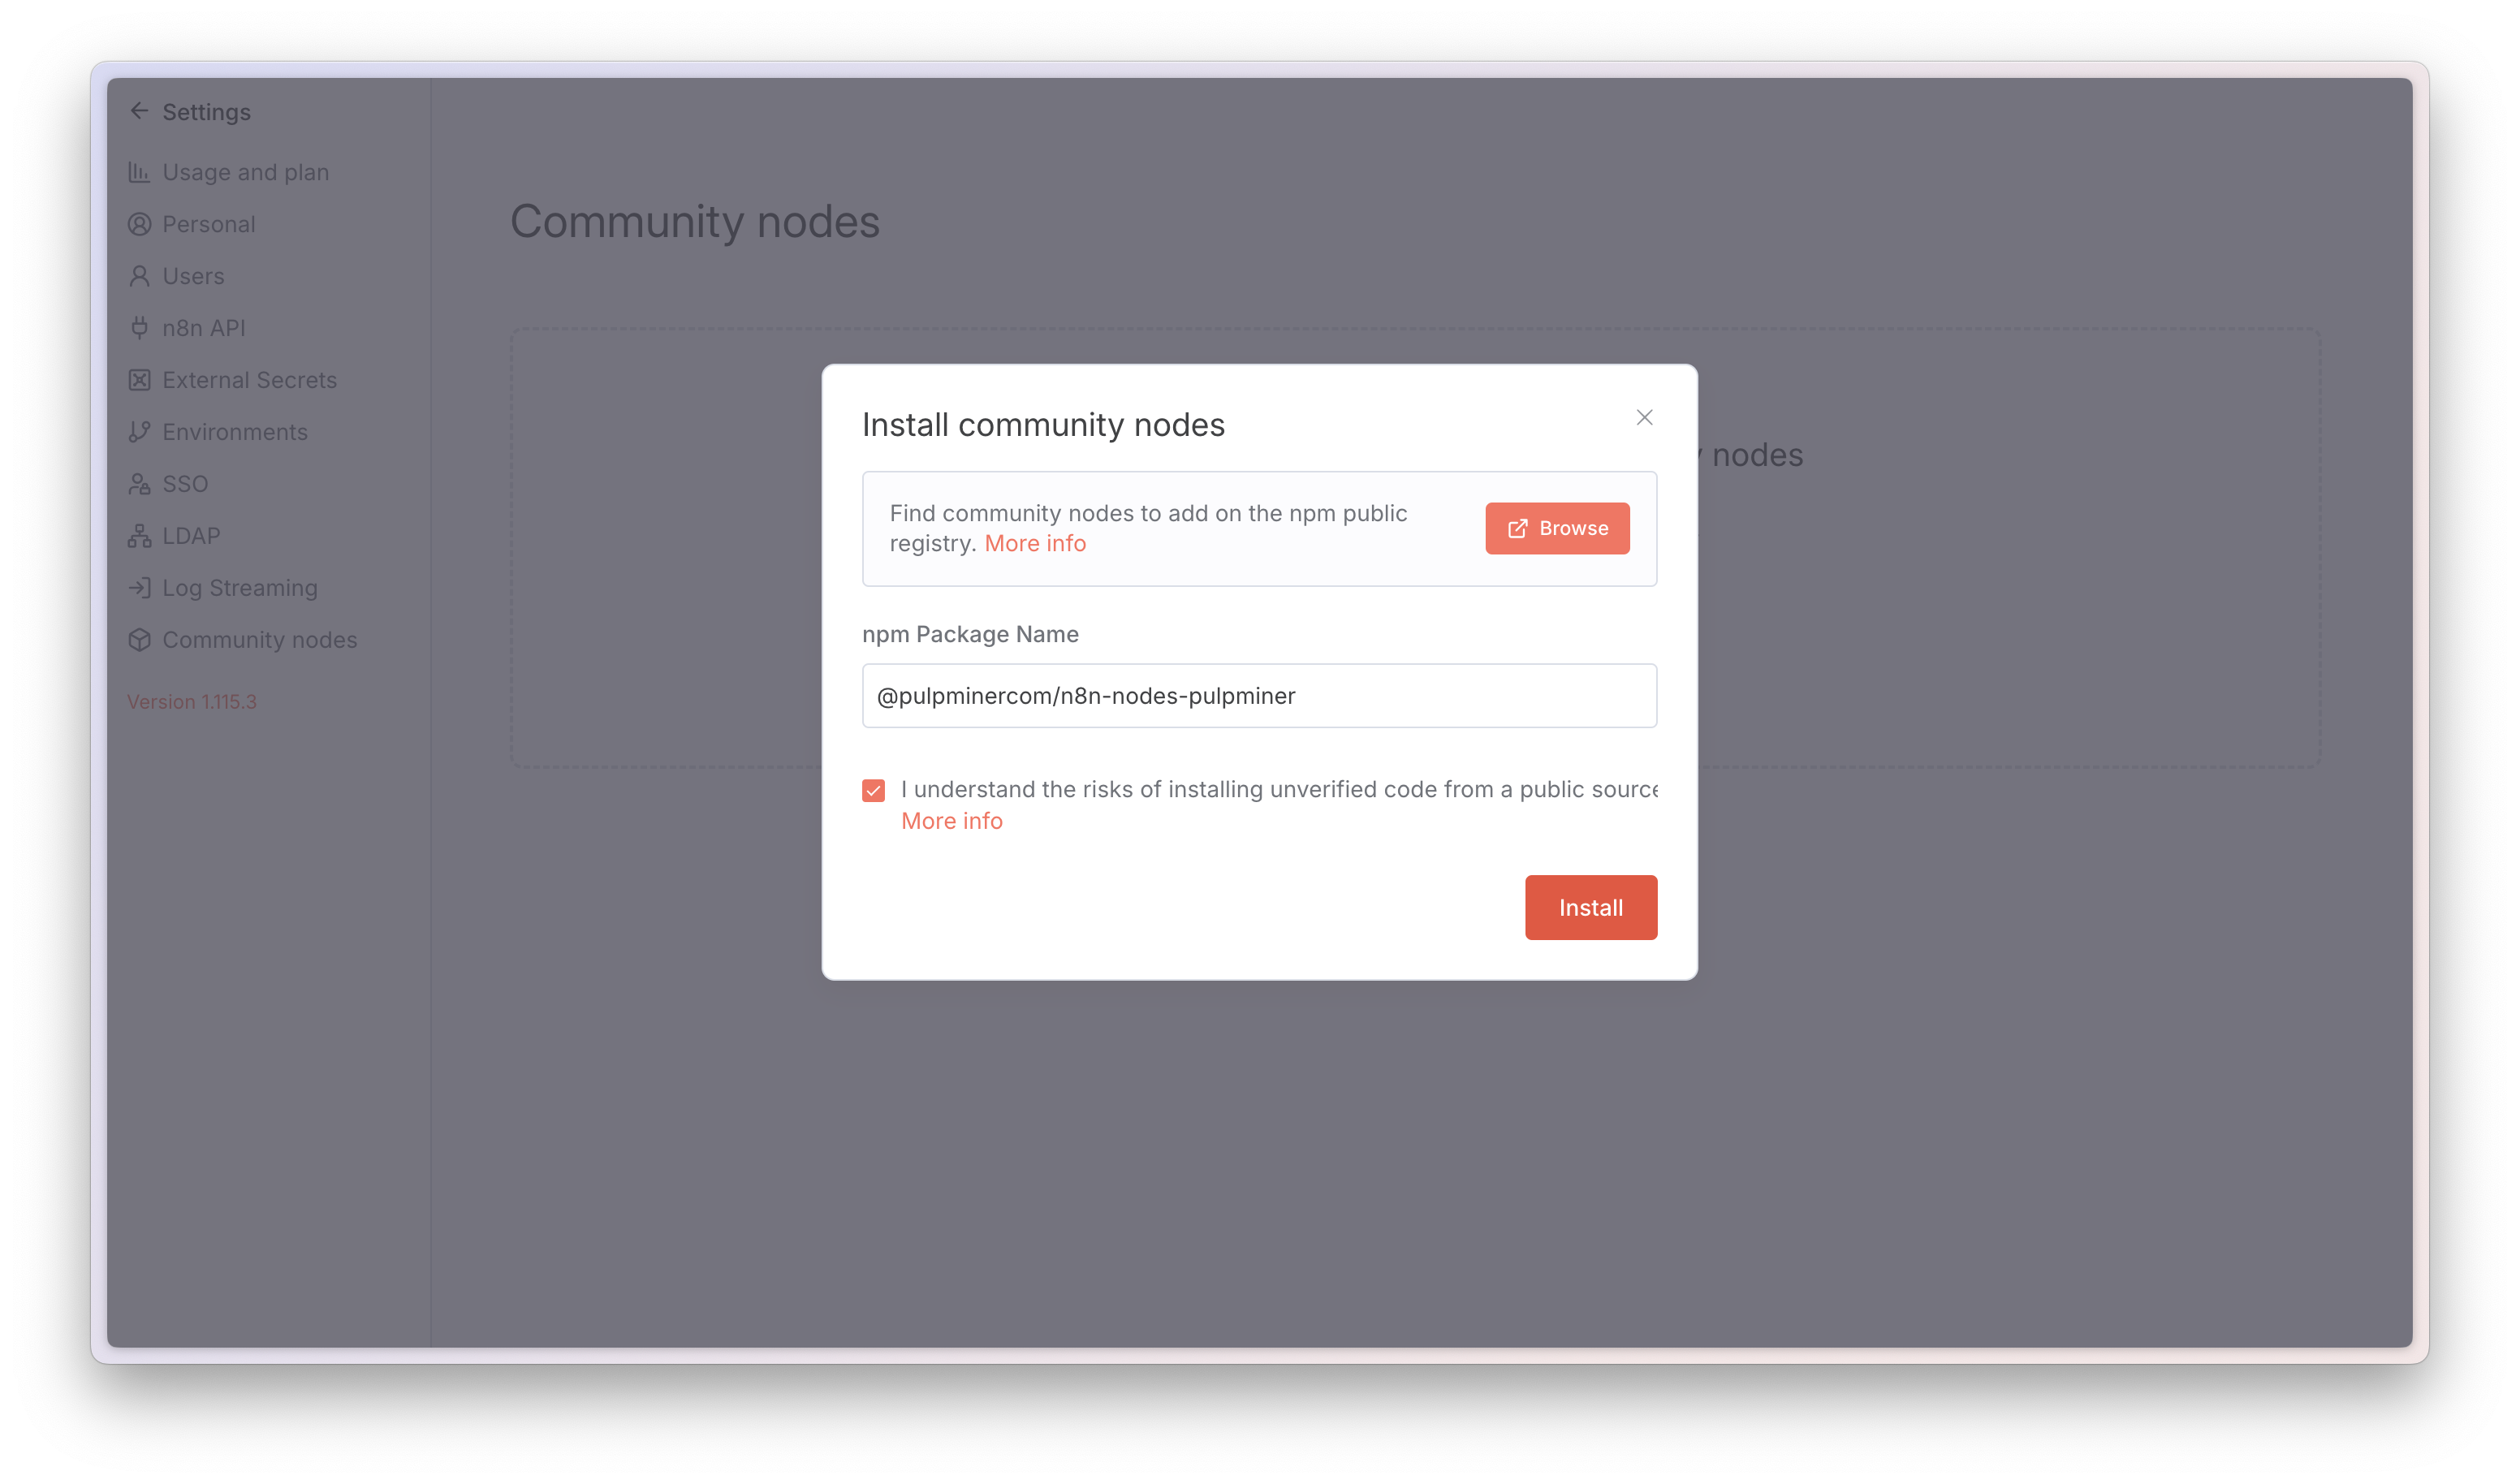
After installation, you may need to restart n8n. The node will appear in the node palette after installation.
Step 3: Find the Node
On your workflow canvas, search for “PulpMiner” in the node palette to find the newly installed node.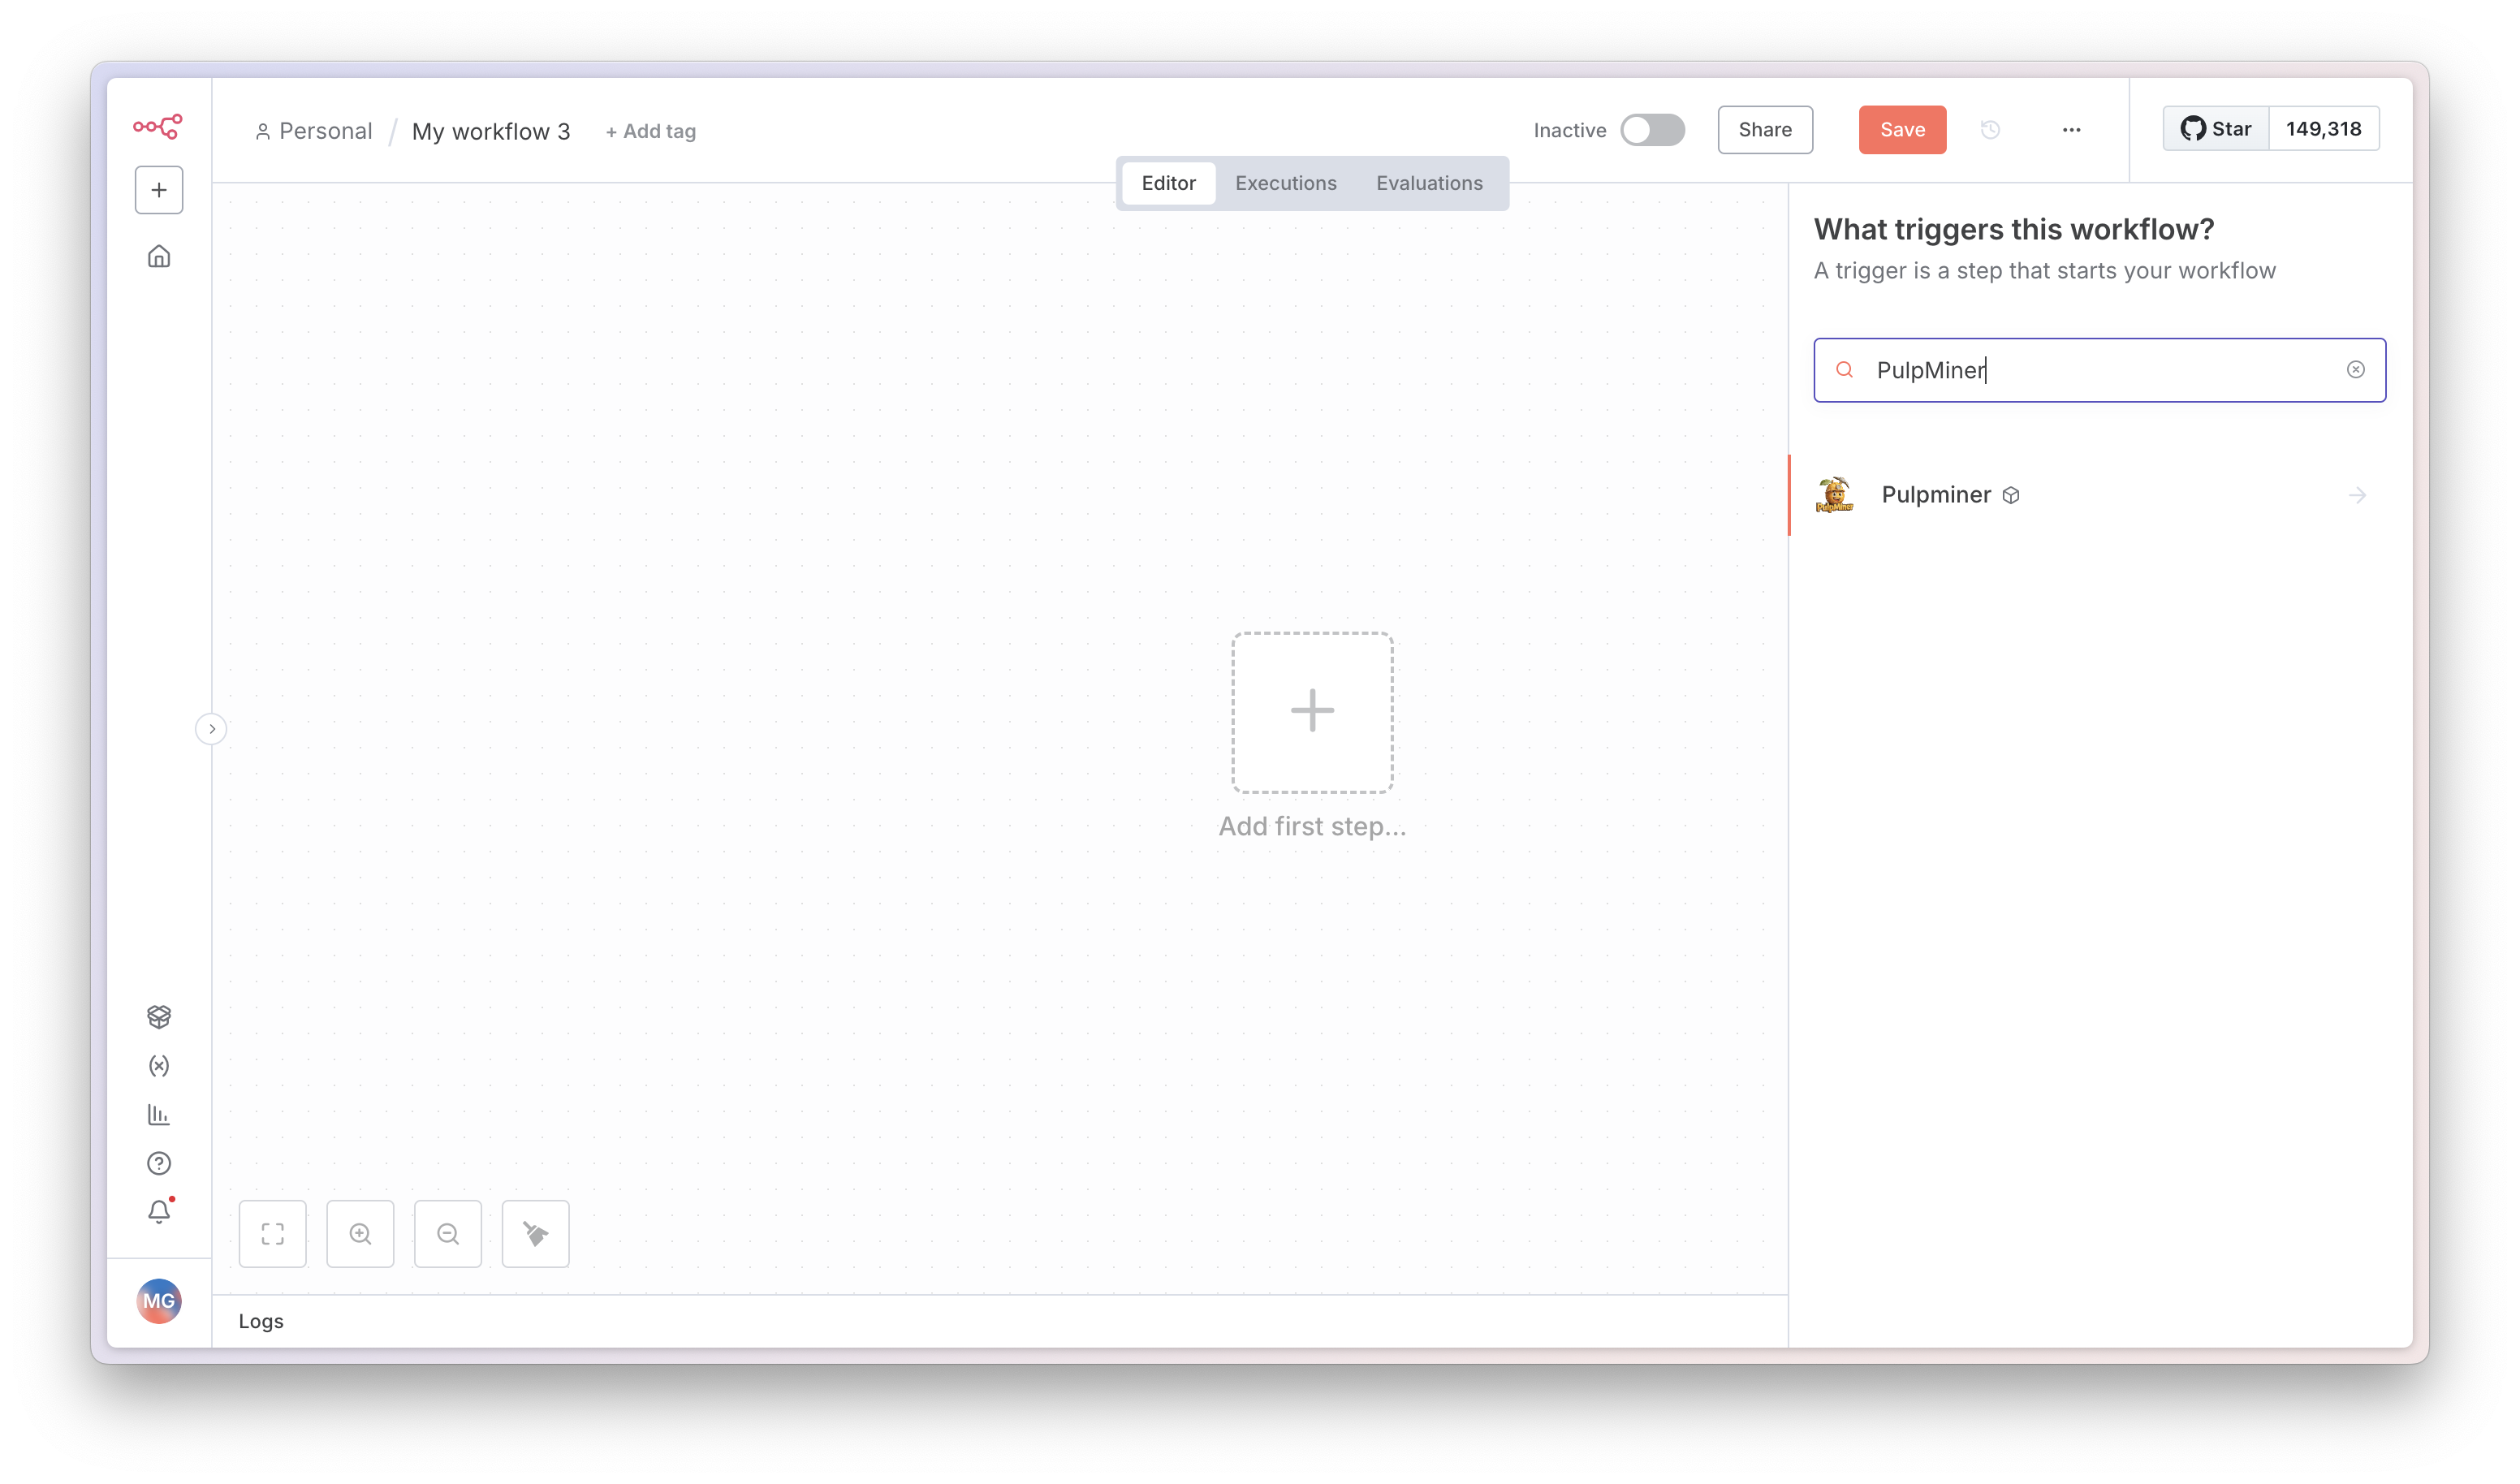
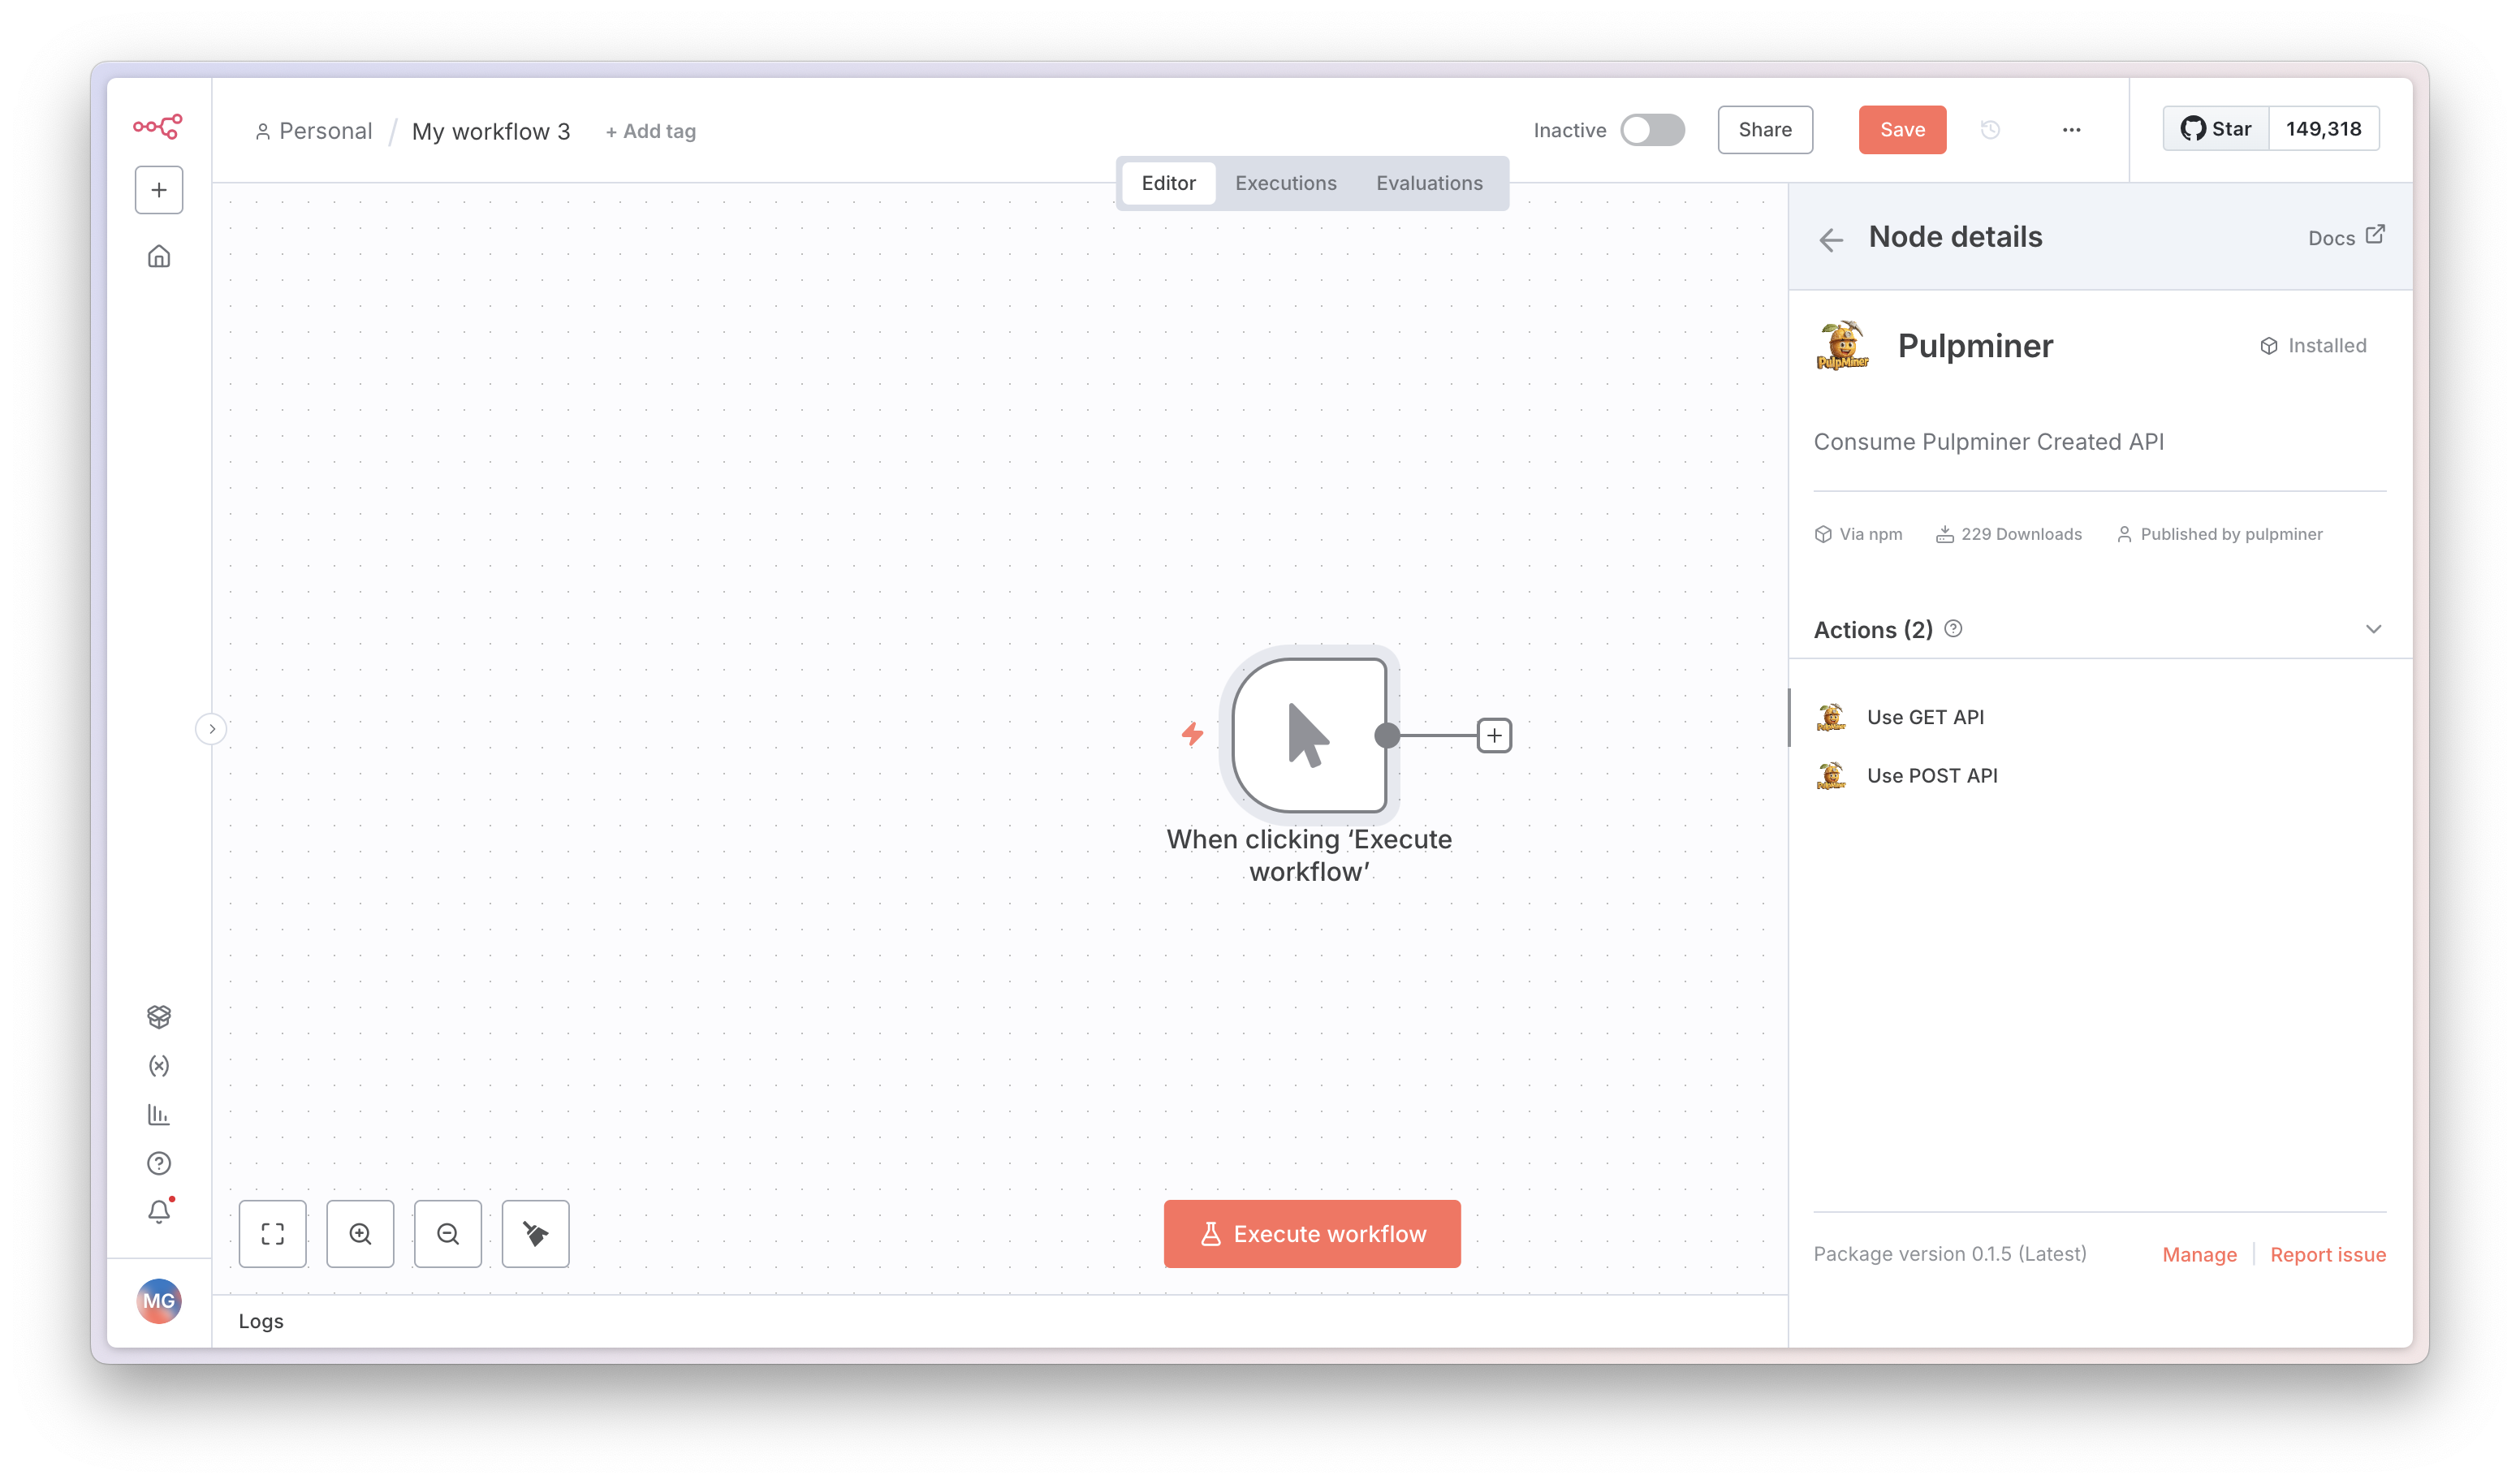
Step 4: Choose Operation
Select the operation type:- GET: For static APIs (fixed URLs, no dynamic variables)
- POST: For dynamic APIs (requires variables in request body)
Authentication
Getting Your API Key
- Log in to your PulpMiner account
- Navigate to the Saved APIs page
- Copy your API key from the API Keys section
- Keep this key secure - you’ll need it for authentication
Setting Up Credentials in n8n
Step 5: Create Credentials
In the PulpMiner node configuration, click on the Credentials field and select Create New. Use the API key you copied from your PulpMiner Saved APIs page.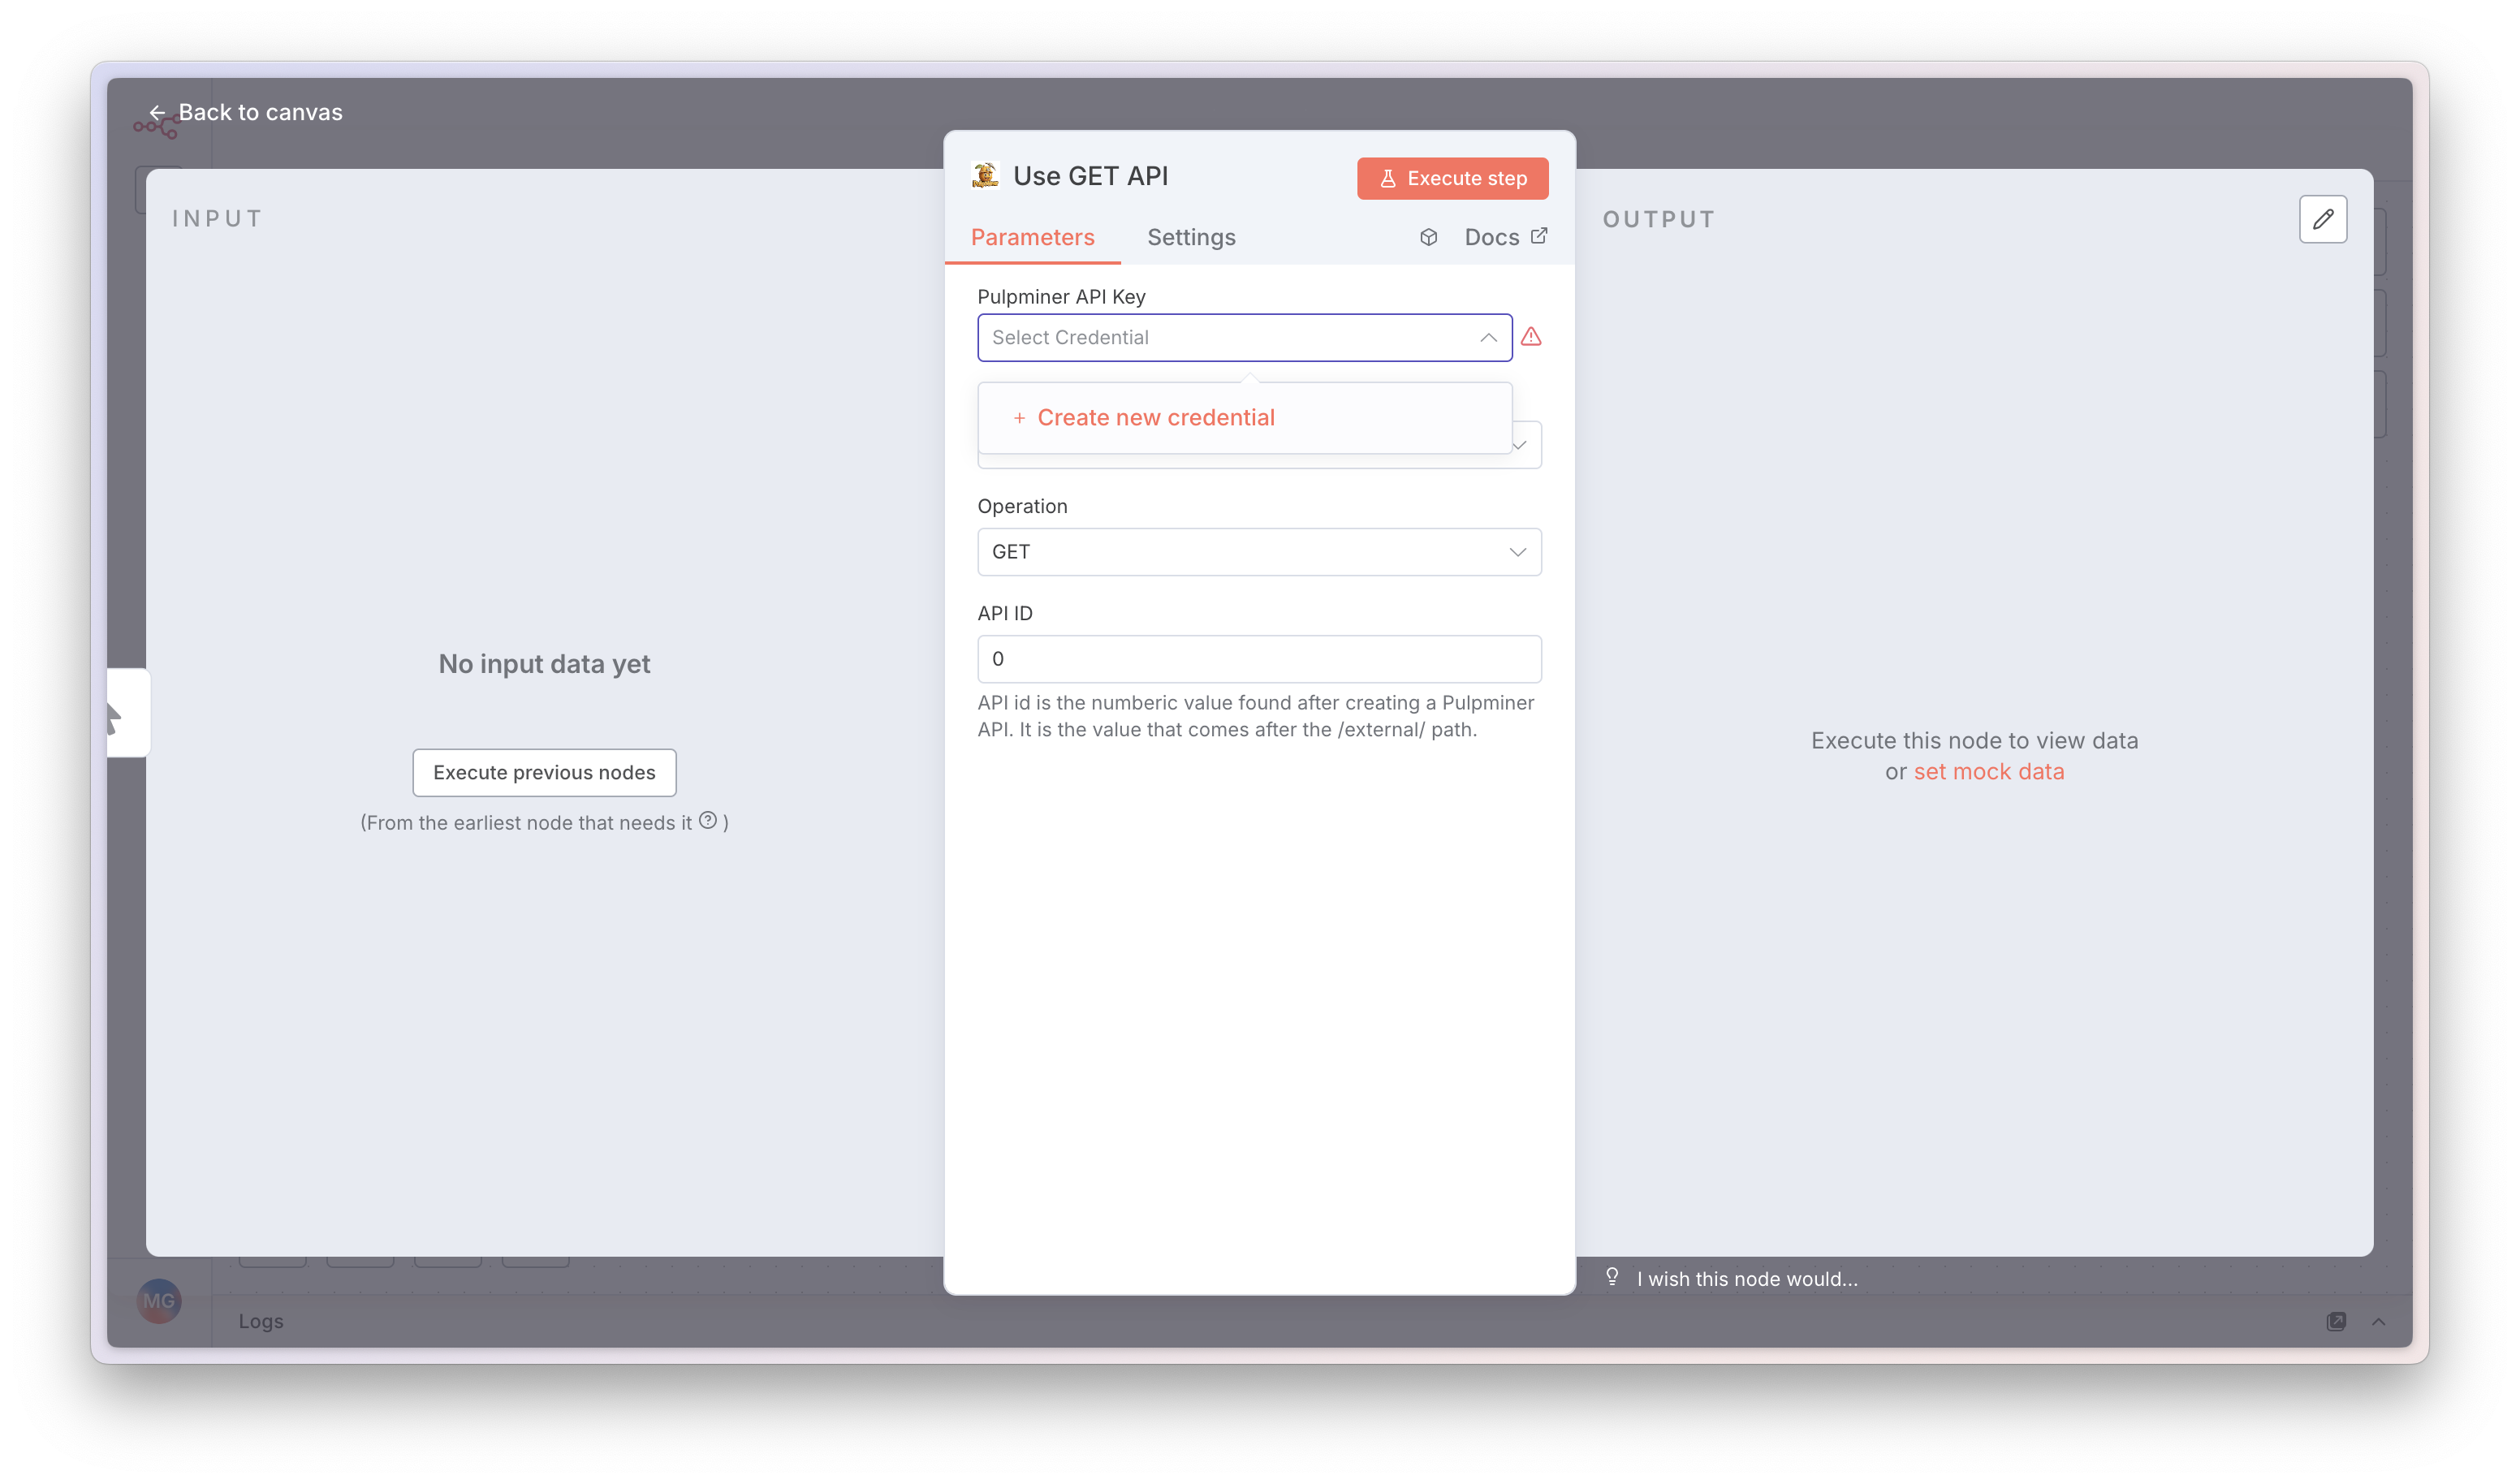
Step 6: Save and Verify
Enter your API key, save the credentials, and verify they’re working correctly.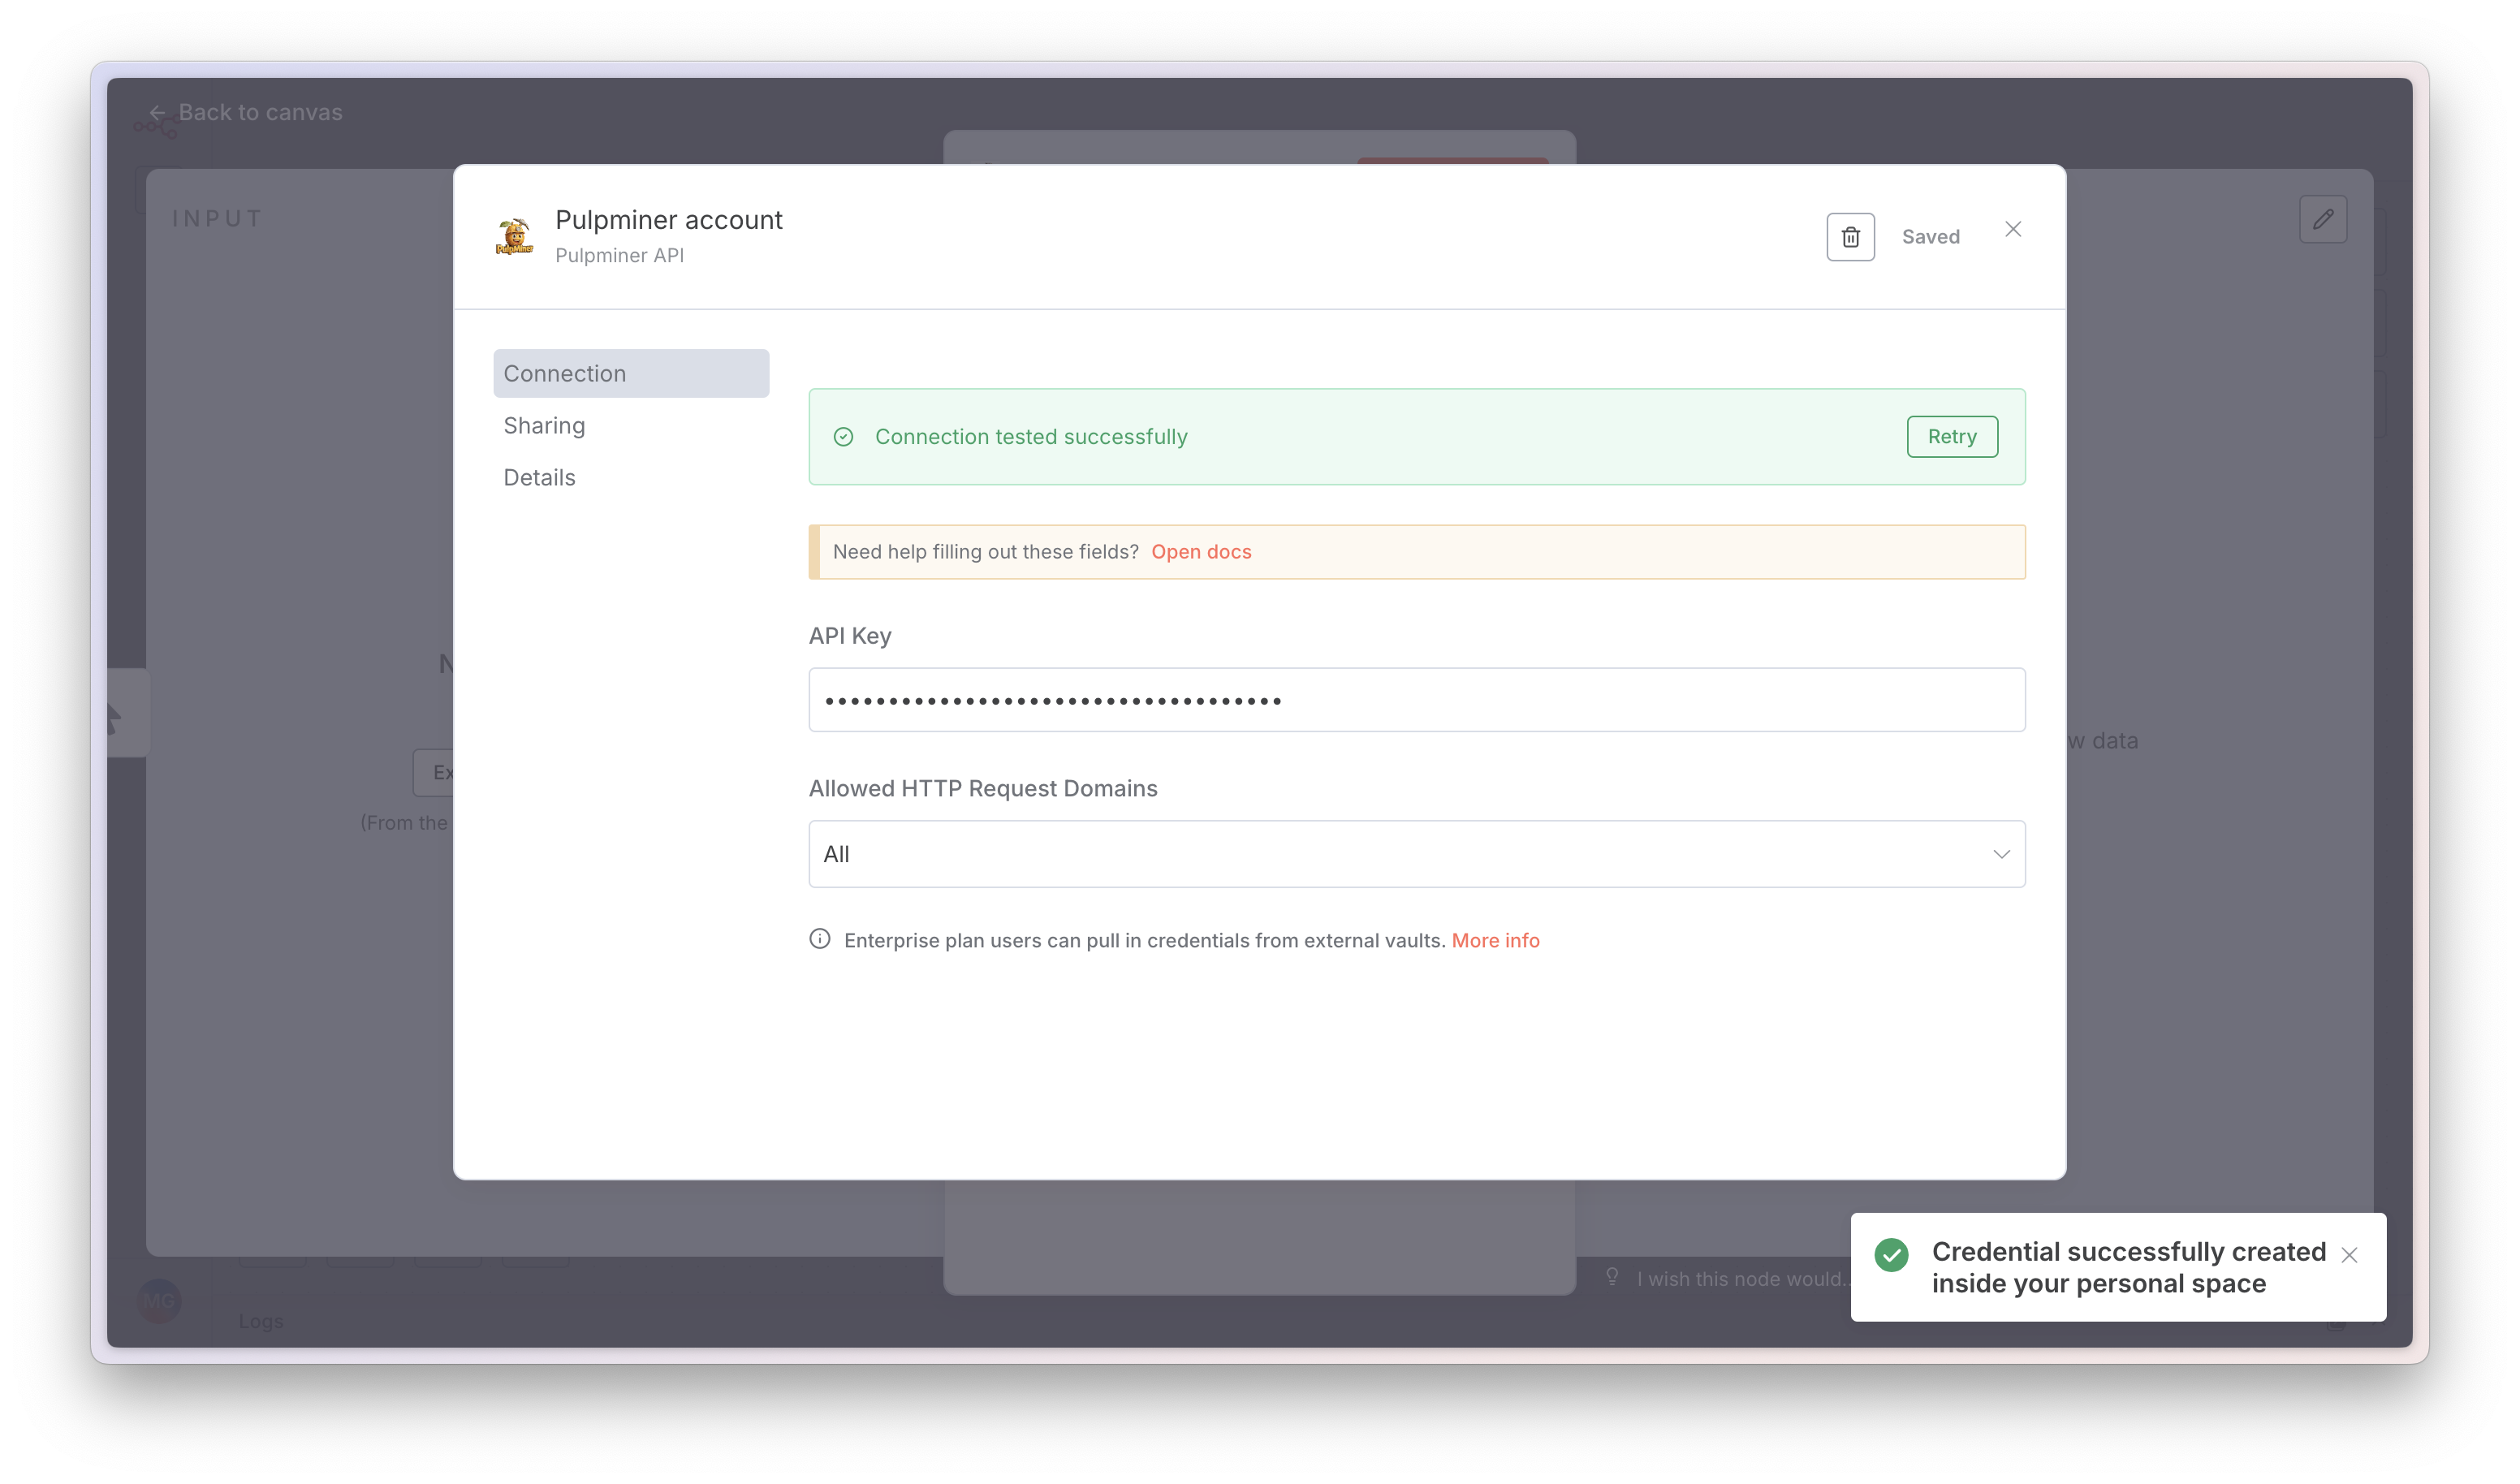
Node Configuration
Basic Setup
After installing the node and setting up credentials, configure the node:- Add the Node: Drag the PulpMiner node from the node palette into your workflow
- Configure Credentials: Select the credentials you created in Step 5
- Set Resource: Choose “API” (currently the only available resource)
- Select Operation: Choose between GET or POST (as shown in Step 4)
- Enter API ID: Input the numeric ID of your saved PulpMiner API
Finding Your API ID
The API ID is the numeric identifier assigned to each API endpoint you create in PulpMiner. You can find it:- In your PulpMiner dashboard after saving an API
- In the API endpoint URL:
https://api.pulpminer.com/external/{api_id}- For example, if your endpoint is
https://api.pulpminer.com/external/566, your API ID is566
- For example, if your endpoint is
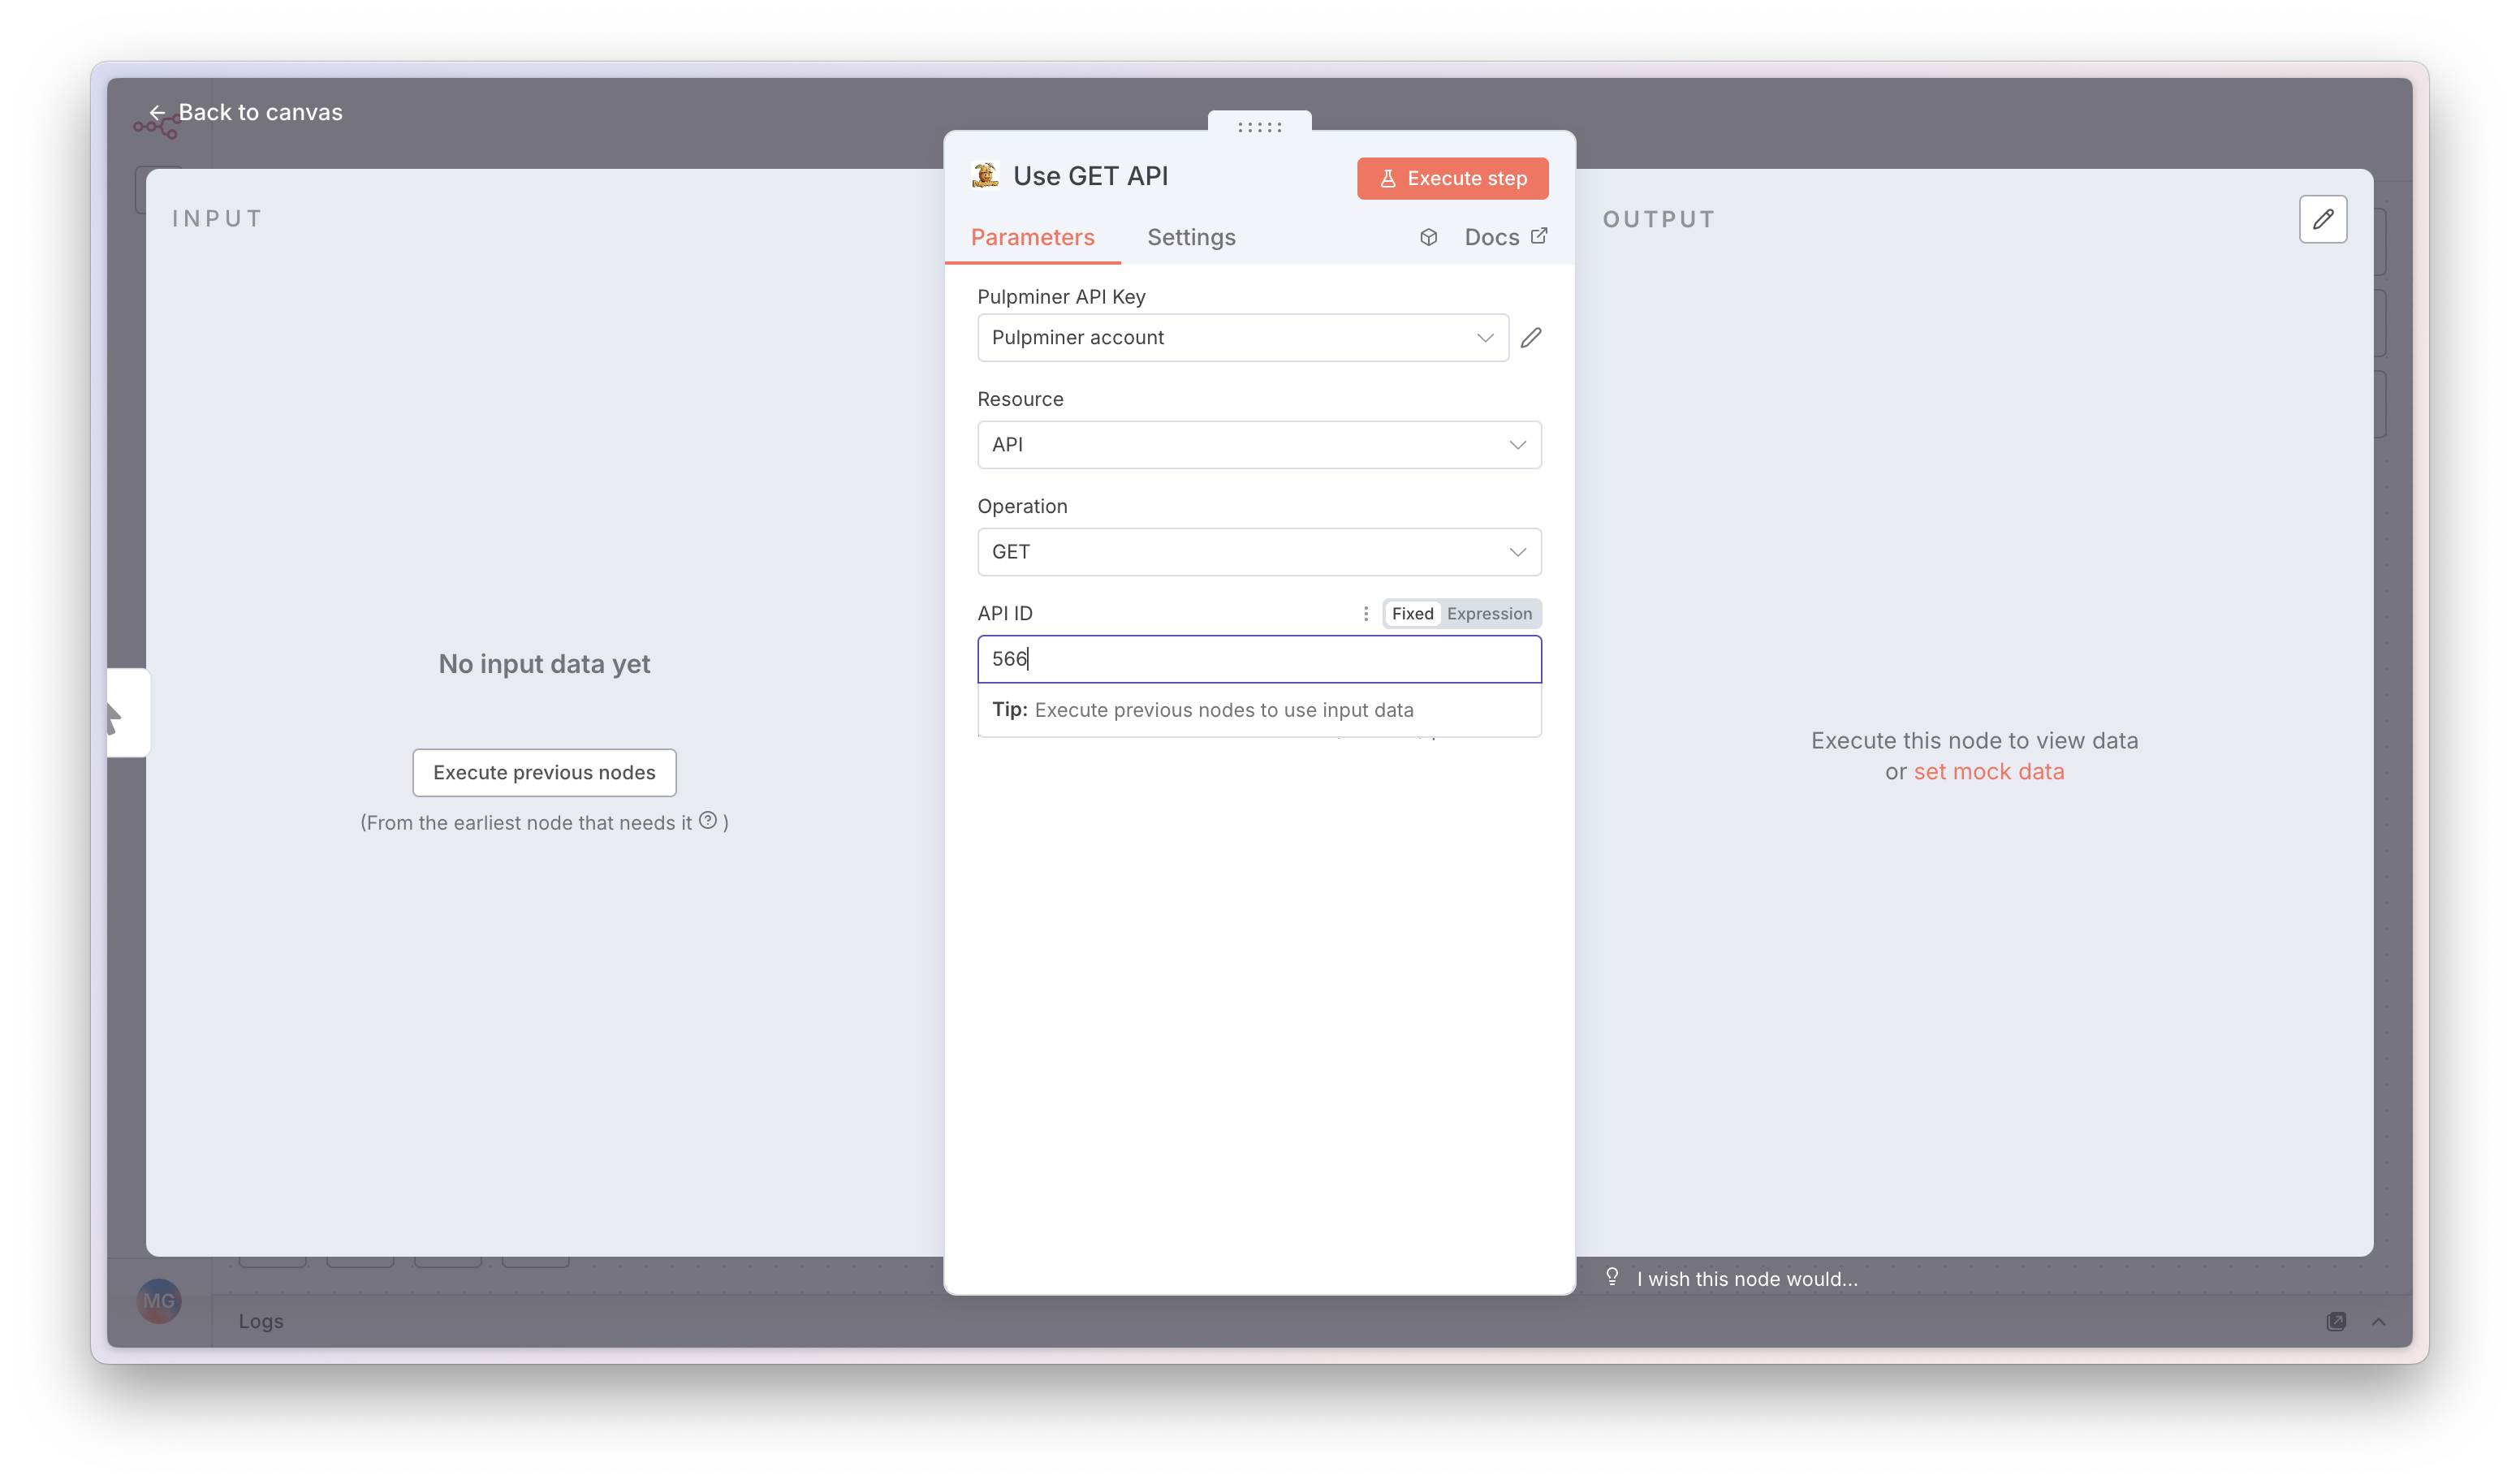
Step 7: Enter API ID
Enter the numeric API ID from your endpoint URL. For example, if your endpoint isapi.pulpminer.com/external/566, enter 566 in the API ID field.
Step 8: Execute and View Results
Click Execute to test your configuration. The JSON data will appear in the right pane, showing the structured data extracted from your webpage.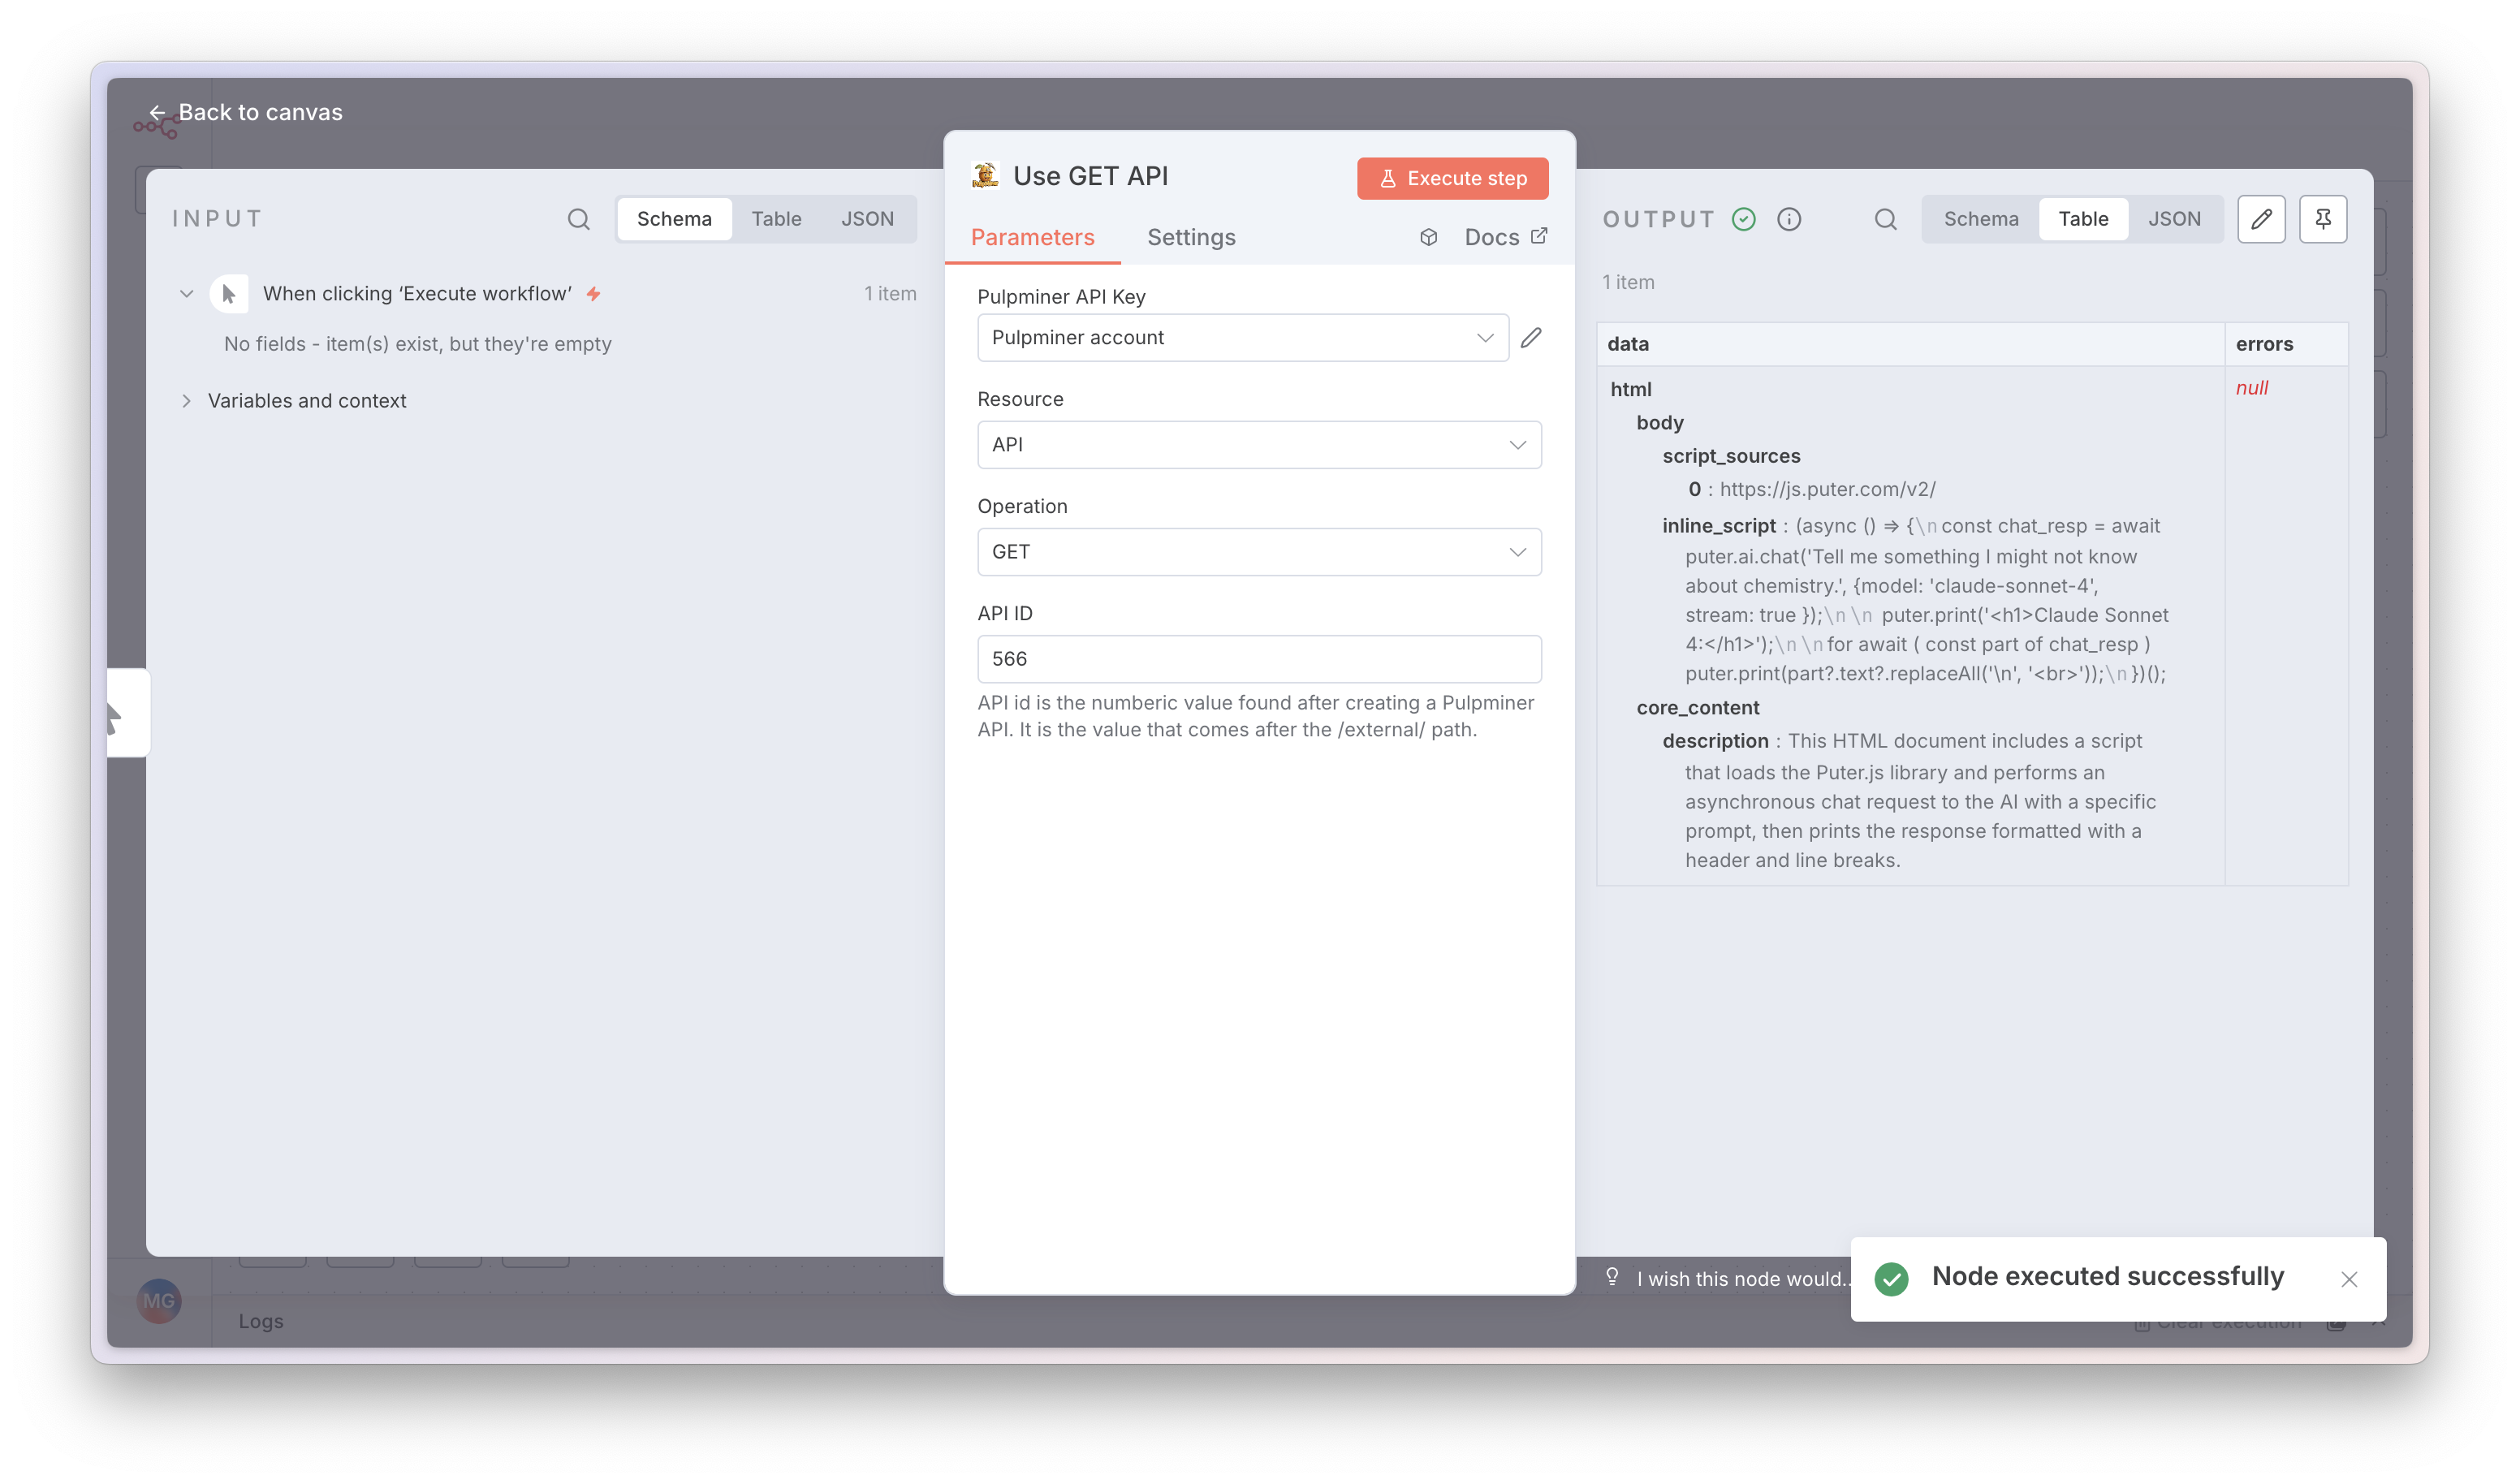
Step 9: Use in Workflow
Your PulpMiner node is now configured and ready to use in your workflow! You can connect it to other nodes to process the extracted data.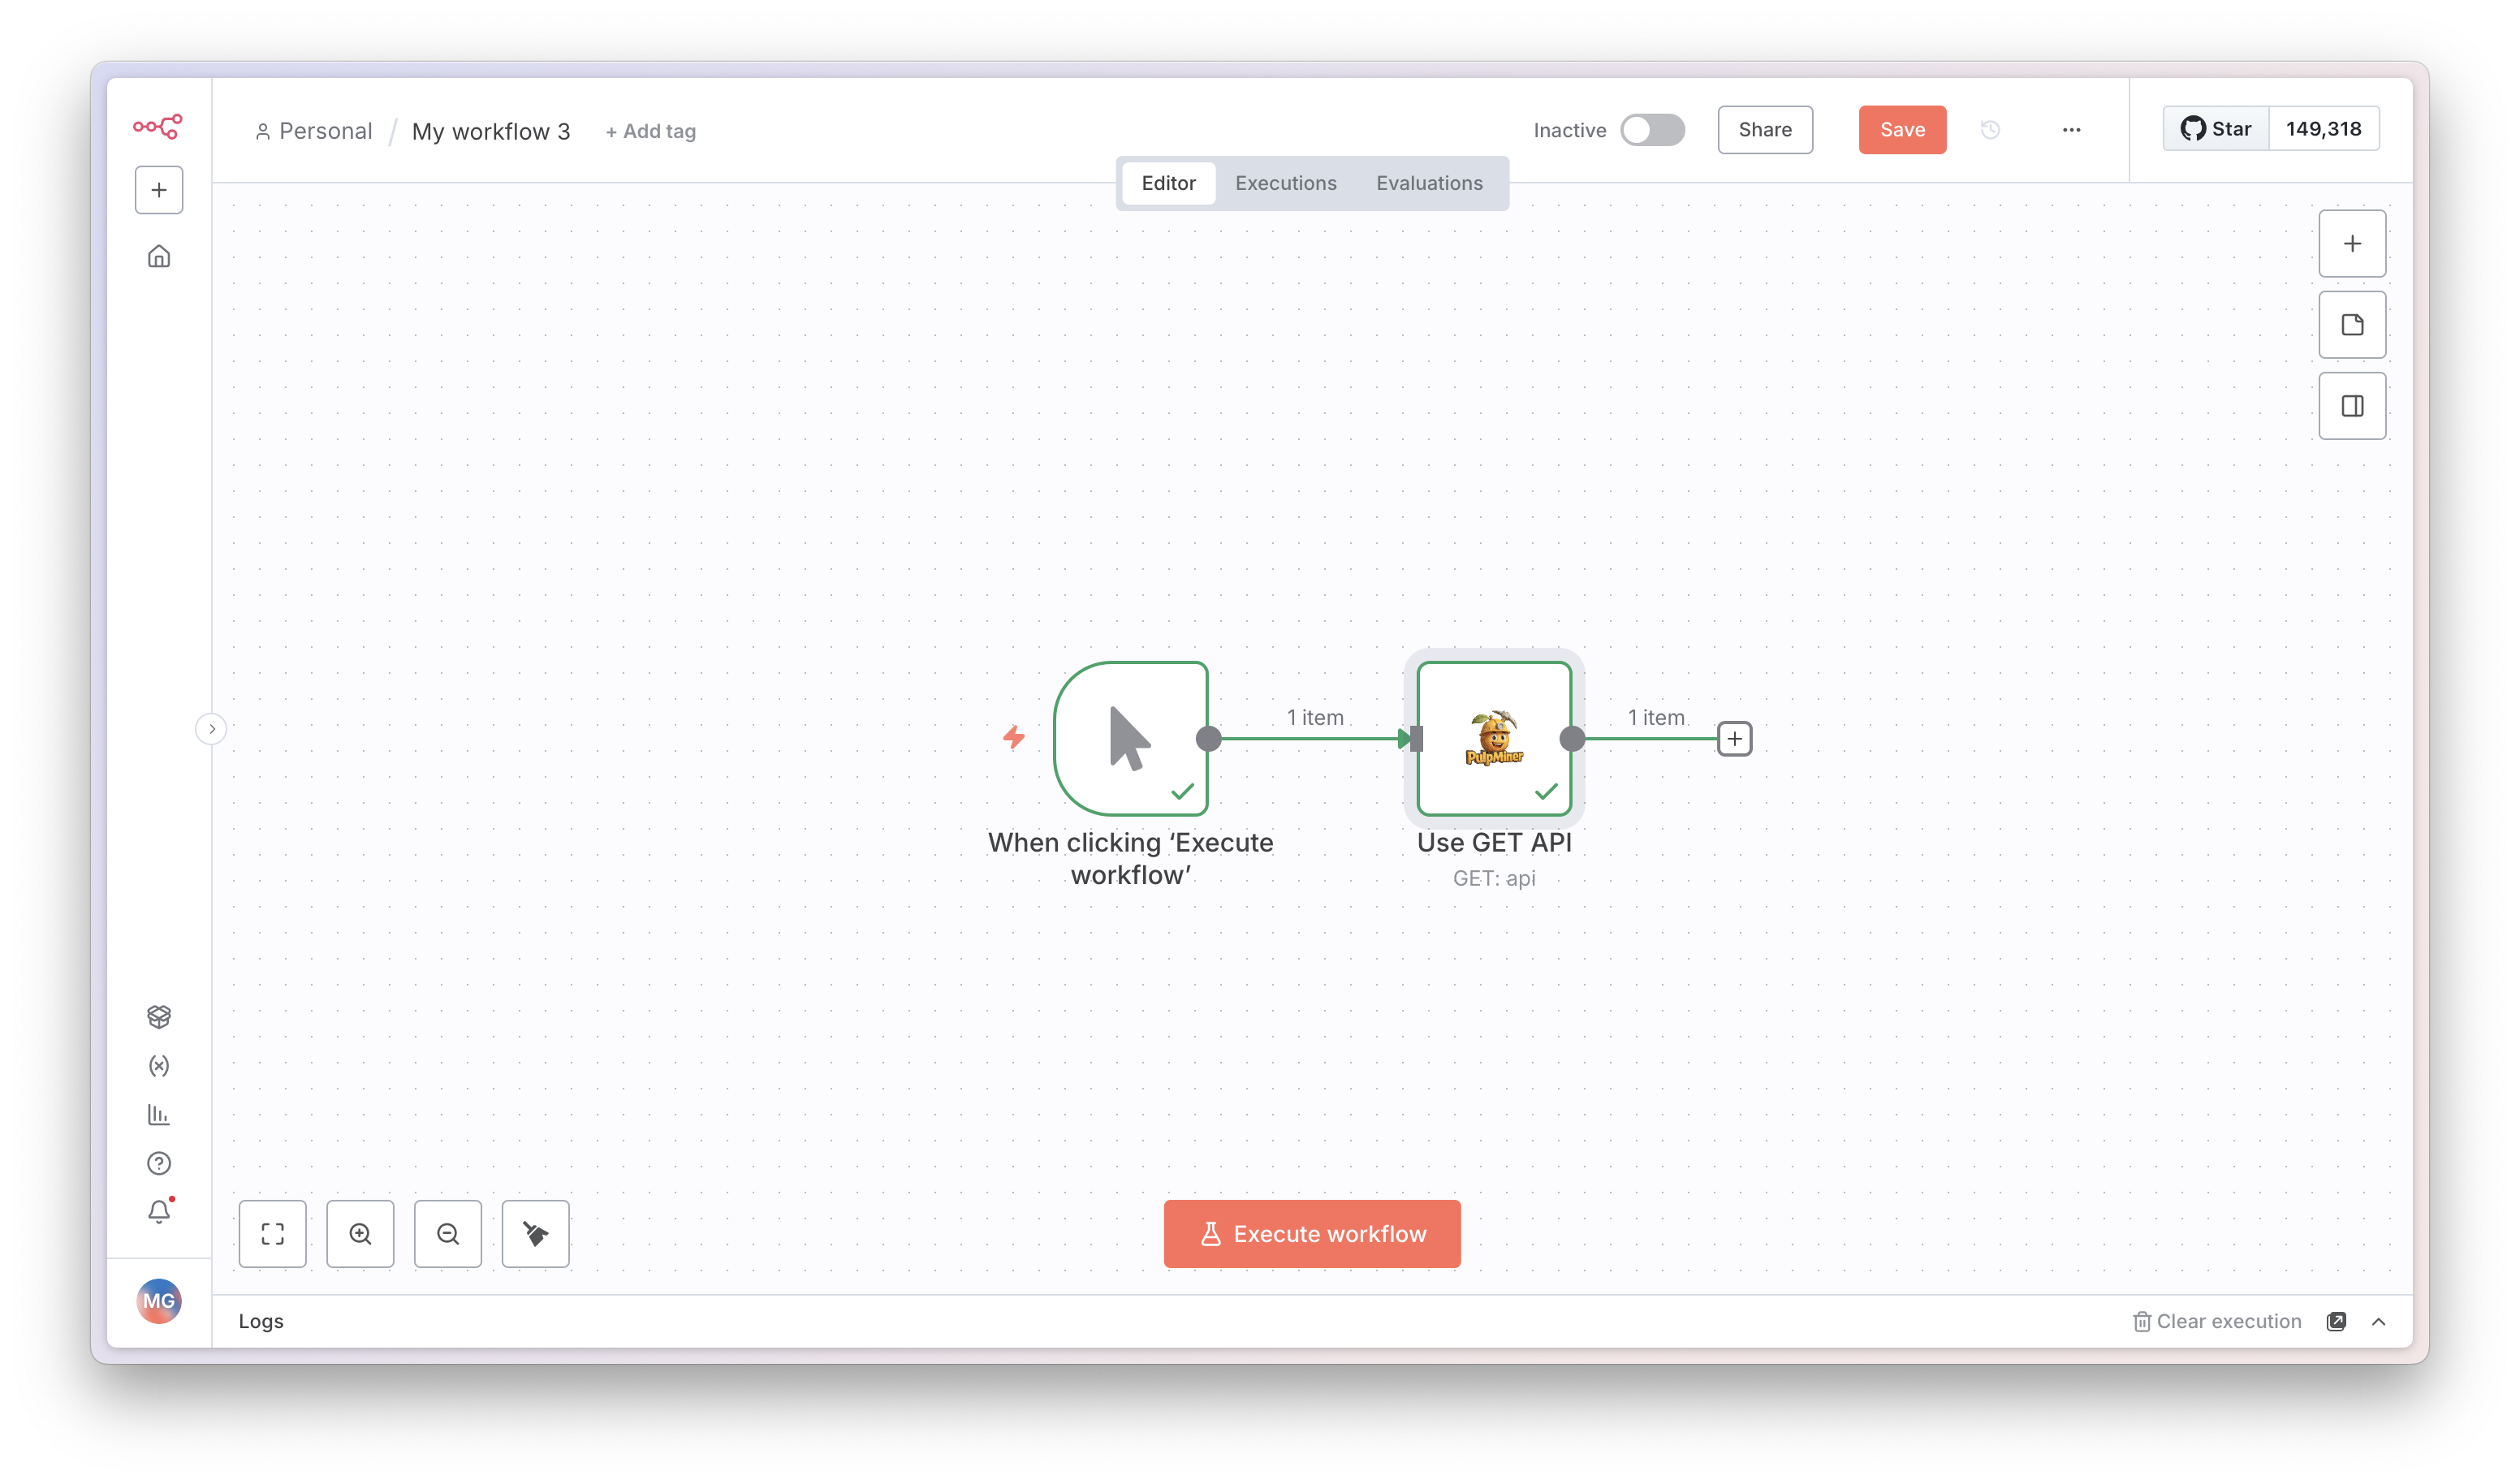
Operations
GET Operation
Use GET for static websites that don’t require dynamic variables:- Select GET as the operation
- Enter your API ID
- The node will make a GET request to your PulpMiner endpoint
- Returns structured JSON data from the webpage
- Extracting data from fixed URLs
- Scraping static content pages
- Fetching data that doesn’t change based on parameters
POST Operation
Use POST for dynamic websites that require variables in the request body:- Select POST as the operation
- Enter your API ID
- Provide the POST Request Body in JSON format
- Include all required dynamic variables as defined in your PulpMiner API configuration
- Product pages with variable IDs
- Search results with dynamic parameters
- Category listings with filters
- User profiles with different usernames
Use Cases
PulpMiner with n8n is perfect for automating various data collection tasks:🛍️ Price Monitoring
🛍️ Price Monitoring
Track competitor prices and get alerts in Slack when prices drop. Perfect for procurement automation.Example: Monitor 100+ products automatically every hour
📰 Content Aggregation
📰 Content Aggregation
Collect news articles, blog posts, and updates from multiple sources into your content database.Example: Build your own news feed from preferred sources
💼 Lead Generation
💼 Lead Generation
Extract contact info from directory sites, company listings, and social profiles for your CRM.Example: Qualify leads from LinkedIn, industry directories
📊 Market Research
📊 Market Research
Track product launches, feature updates, and market trends from competitor websites.Example: Stay ahead of competitor product releases
🏢 Real Estate Automation
🏢 Real Estate Automation
Monitor property listings, prices, and availability. Send new listings to buyers automatically.Example: Get instant Slack notifications for new properties
🎓 Course Tracking
🎓 Course Tracking
Watch for new courses, enrollment dates, and price changes on learning platforms.Example: Never miss enrollment deadlines
Workflow Examples
Example 1: Daily News Aggregation
Scenario: Extract news headlines from a website every day and send them via email. Workflow:- Schedule Trigger: Set to run daily at 9 AM
- PulpMiner Node:
- Operation: GET
- API ID: Your news website API ID
- Code Node: Process the JSON data to extract headlines
- Email Node: Send formatted news summary
Example 2: Product Price Monitoring
Scenario: Monitor product prices from an e-commerce site and alert when prices drop. Workflow:- Schedule Trigger: Run every hour
- PulpMiner Node:
- Operation: POST
- API ID: Your product API ID
- Request Body:
{"productId": "12345"}
- IF Node: Check if price is below threshold
- Slack/Email Node: Send alert if condition is met
Example 3: Multi-Source Data Aggregation
Scenario: Collect data from multiple websites and combine into a single dataset. Workflow:- Manual Trigger or Webhook
- Multiple PulpMiner Nodes: Each fetching from different sources
- Merge Node: Combine all data
- Database Node: Store aggregated results
Example 4: Dynamic Content Extraction
Scenario: Extract user-specific content based on input from a webhook. Workflow:- Webhook Trigger: Receives user ID
- PulpMiner Node:
- Operation: POST
- API ID: Your dynamic API ID
- Request Body: Use expression
{{ $json.userId }}to pass webhook data
- Process Data: Transform extracted data
- Return Response: Send data back to webhook caller
Using Expressions
n8n expressions allow you to dynamically pass data between nodes. Here are some useful patterns:Passing Data from Previous Nodes
In POST Request Body:Using Variables
You can use n8n variables in your API ID or request body:Error Handling
Common Errors
-
Authentication Error
- Cause: Invalid or missing API key
- Solution: Verify your API key in credentials and ensure it’s active
-
Invalid API ID
- Cause: API ID doesn’t exist or is incorrect
- Solution: Check your PulpMiner dashboard for the correct API ID
-
Missing Variables
- Cause: POST request missing required dynamic variables
- Solution: Ensure all variables defined in your PulpMiner API are included in the request body
-
Rate Limiting
- Cause: Exceeding credit limits or request rate
- Solution: Check your credit balance and implement delays between requests
Implementing Error Handling
Use n8n’s IF node to check for errors:- After the PulpMiner node, add an IF node
- Check if
{{ $json.errors }}exists - Route errors to a notification node
- Route successful responses to processing nodes
Best Practices
1. Credential Management
- Rotate API keys periodically
- Never commit API keys to version control
2. Rate Limiting
- Implement delays between requests when processing multiple items
- Monitor your PulpMiner credit usage
- Use n8n’s rate limiting features for high-volume workflows
3. Data Processing
- Always validate the structure of returned JSON data
- Use n8n’s Code node for complex data transformations
- Store raw data before processing for debugging
4. Caching
- Enable caching in your PulpMiner API when appropriate
- Use n8n’s caching features for frequently accessed data
- Balance between data freshness and performance
5. Monitoring
- Set up error notifications for failed workflows
- Monitor credit usage in your PulpMiner dashboard
- Log important workflow executions
Advanced Usage
Batch Processing
Process multiple items in a single workflow:- Trigger that provides multiple items (e.g., CSV import, database query)
- PulpMiner Node processes each item automatically
- Process Results for all items
Conditional API Calls
Use different APIs based on conditions:- IF Node: Check condition
- Multiple PulpMiner Nodes: Different APIs for different branches
- Merge Node: Combine results
Looping Through Data
Extract data for multiple items:- Loop Over Items node
- PulpMiner Node with dynamic POST body
- Aggregate Results
Troubleshooting
Node Not Appearing
- Ensure the node is installed correctly
- Restart n8n after installation
- Check n8n version compatibility (1.113.3+)
Authentication Issues
- Verify API key is correct
- Check if API key is active in PulpMiner dashboard
- Ensure credentials are saved properly in n8n
Data Not Returning
- Verify API ID is correct
- Check if the source webpage is accessible
- Review PulpMiner API status in dashboard
- Test the API directly with curl first
Dynamic Variables Not Working
- Ensure variable names match exactly (case-sensitive)
- Verify all required variables are provided
- Check JSON format in POST request body
- Review your PulpMiner API configuration
Quick Reference
Package Name
Installation Command
In n8n Settings → Community Nodes, enter:Minimum Requirements
- n8n version: 1.113.3 or higher
- Node.js version: 23.11+ (for n8n)
- PulpMiner account with API key
Resources
- n8n Documentation
- n8n Community Nodes Guide
- PulpMiner API Documentation
- PulpMiner API Keys Guide
- PulpMiner Website
- GitHub Repository
Support
If you encounter issues with the n8n integration:- Check the PulpMiner API documentation
- Review n8n workflow execution logs
- Test your PulpMiner API directly with curl
- Contact support at hello@pulpminer.com
Next Steps
- Learn more about PulpMiner API endpoints
- Explore dynamic variables
- Check out caching strategies
- Review credit management